Planting
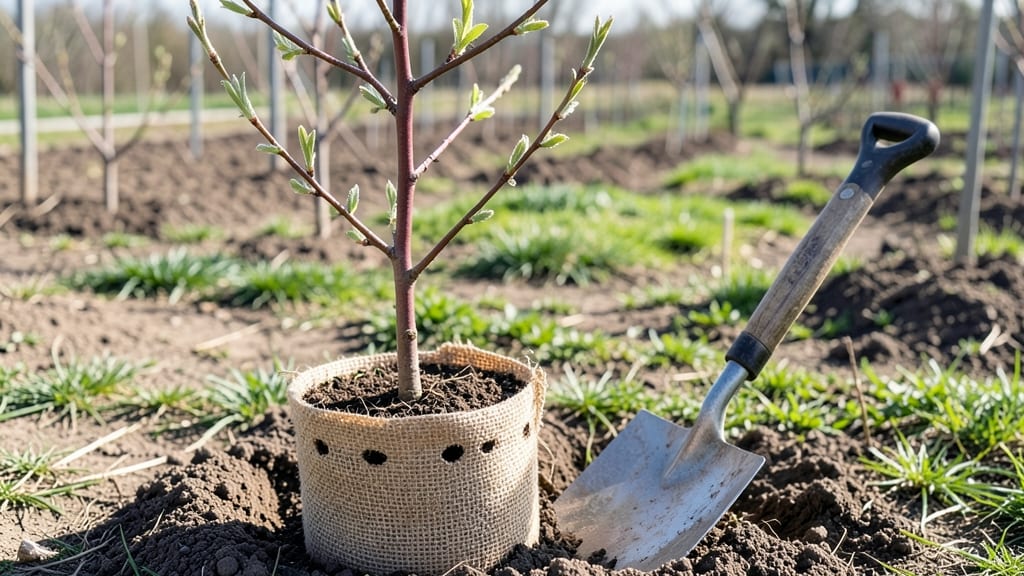
Transplanting a cherry tree the right way means it’ll thrive for decades—not just survive the move. I’ve relocated three mature trees myself, and the difference between a stressed plant and a booming one comes down to timing, root care, and a little patience.
The best time to move yours is late fall or early spring, when the tree’s energy is low but the ground isn’t frozen.
You’ll need basic tools—a sharp shovel, burlap for wrapping roots, pruning shears, and a wheelbarrow to haul everything. For bare-root trees, soak the roots in water for 2–3 hours before transplanting.
Container-grown trees need their root ball loosened gently to encourage new growth. The goal is to minimize root damage while giving the tree enough space to spread in its new home.
After planting, water deeply to settle the soil and keep the root zone moist for the first month. A 2–3 inch layer of mulch will protect the roots from temperature swings and retain moisture.
Watch for signs of stress—wilting leaves or yellowing—but don’t panic. Most cherry trees bounce back within a season if you’ve followed these steps.
Young trees handle relocation better than mature ones, but even a 20-year-old can recover with proper care. The key is balancing root disturbance with post-transplant support. With the right approach, your cherry tree will grow stronger in its new spot—producing fruit for years to come.
📚 In This Guide
- What you need
- Instructions
- Tips and common mistakes
- Wrapping up and next steps
What you need
- ● Shovel or spade: A sharp-edged digging spade (18–24 inches wide) for precise excavation. For larger trees, a transplanting spade or auger (2–3 feet long) is ideal.
- ● Pruning shears or saw: Bypass pruners for small branches (for saplings) or a pruning saw (for thicker limbs).
- ● Root stimulator: A powder or gel (e.g., Rootone) to encourage root growth post-transplant. Use 1–2 teaspoons per hole.
- ● Mulch: Organic mulch (wood chips, shredded bark, or pine straw) to retain moisture and regulate soil temperature. Apply a 2–4 inch layer around the base (keep it 6 inches away from the trunk).
- ● Watering can or hose: With a gentle spray nozzle to avoid displacing soil. Aim for 1–2 gallons per transplant initially.
- ○ Staking materials (optional): 2–4 wooden stakes (1–2 inches in diameter, 4–6 feet tall).
- ● Soft tree ties (not wire!) to secure the tree without damaging the trunk.
- ● Soil amendments (if needed): Compost or well-rotted manure to improve soil fertility (mix 1 part amendment to 3 parts native soil).
- ● Gypsum (if soil is clay-heavy) to improve drainage.
- ● Timing: Transplant during dormant season (late fall or early spring) to minimize stress. Avoid extreme heat or frost.
- ● Weather check: Plan for a cloudy day or water the tree thoroughly 1–2 days before transplanting to keep roots moist.
- ● New location prep: Dig a hole twice as wide as the root ball but no deeper.
- ● Ensure the site has 6+ hours of sunlight (cherry trees thrive in full sun!).
- ○ Safety gear (optional but recommended): Gloves (gardening or work gloves).
- ● Knee pads for comfort during digging.
Instructions for transplanting a cherry tree with minimal stress
Relocating a cherry tree successfully depends on timing, root care, and gradual adjustment. Here’s how to move it without shocking the plant.
Prepare the New Location and Dig the Hole
Choose a spot that mimics the tree’s original conditions—at least 20 feet from structures and in full sun for at least 6 hours daily. Cherry trees thrive in well-draining soil with a pH between 6.0 and 7.0. Dig a hole twice as wide as the root ball but only as deep as the container or root system. This prevents burying the trunk too deeply, which can suffocate the tree.
Loosen the soil at the bottom of the hole with a shovel or garden fork to encourage root spread. Avoid compacting the soil—this restricts root growth and weakens the tree’s ability to establish itself. If your soil is heavy clay, mix in 2 inches of compost from the ingredients list to improve drainage and fertility. Water the hole thoroughly 24 hours before transplanting to settle the soil.
Prune Roots and Remove the Tree from Its Current Spot
Start by pruning the roots with clean, sharp pruners to reduce transplant shock. Trim any roots that are longer than 12 inches or circling the root ball—these can strangle the tree as it grows. Focus on cutting roots that are thicker than a pencil to minimize damage while still encouraging a healthy root system. Water the tree deeply 1-2 days before moving to help roots absorb moisture and reduce stress.
Dig around the root ball in a wide, shallow trench to avoid severing large roots. Use a shovel or spade to lift the tree carefully, keeping as much of the root ball intact as possible. If the tree is in a container, slide it out gently—tap the sides if needed to loosen compacted roots. Wrap the root ball in burlap or a tarp if transporting it to the new location to protect it from drying out.
Plant the Cherry Tree in Its New Home
Place the tree in the prepared hole so the top of the root ball sits level with the surrounding soil. Avoid burying the trunk too deeply—this can lead to rot or girdling roots. Backfill the hole with the native soil, tamping it down gently in 2-inch layers to remove air pockets. Water slowly but deeply as you fill the hole to help the soil settle naturally around the roots.
Once the hole is filled, create a water basin around the tree by mounding soil 2-3 inches high to direct water toward the roots. Water the tree thoroughly to encourage roots to spread into the surrounding soil. Mulch the base of the tree with 2-3 inches of organic mulch, keeping it 6 inches away from the trunk to prevent rot. This helps retain moisture and regulates soil temperature.
Support and Care for the Tree Post-Transplant
Stake the tree if it’s taller than 6 feet or if the site is windy. Use two stakes positioned opposite each other, tied loosely with soft fabric strips to avoid damaging the trunk. Water the tree deeply every 3-5 days for the first month, then taper off to once a week once the tree shows signs of new growth. Avoid overwatering—soil should be moist but not soggy at a depth of 2 inches.
Prune any broken or damaged branches immediately after transplanting to reduce stress. Avoid heavy pruning—focus on removing only what’s necessary to encourage healing. Fertilize the tree 6-8 weeks after transplanting with a balanced, slow-release fertilizer to support root establishment. Monitor the tree closely for signs of stress, such as wilting leaves or yellowing foliage, and adjust care as needed.
Gradually Acclimate the Tree to Its New Environment
Cherry trees need time to adjust to their new location. For the first year, avoid pruning beyond light maintenance. Instead, focus on watering deeply and consistently and protecting the tree from extreme weather. If the tree shows signs of leaf scorch or wilting, it may need more frequent watering or shade during hot afternoons.
By the end of the first growing season, the tree should have new shoots and leaves, indicating successful establishment. After 12 months, you can resume normal pruning and care routines. Patience is key—cherry trees can take 2-3 years to fully recover from transplanting, but with the right care, they’ll thrive in their new home for decades.
Tips & tricks for transplanting a cherry tree
Moving a cherry tree without causing stress requires careful planning and attention to detail. These practical tips will help you avoid common mistakes and give your tree the best chance to thrive in its new location.
Timing is Everything: The 24-hour preparation period before transplanting is crucial. This allows the soil to settle properly and ensures the tree is well-hydrated. I always water the hole thoroughly during this time, which helps create a more stable environment for the roots. If you're transplanting during hot weather, consider scheduling the move for early morning or late afternoon to reduce heat stress on the tree.
Root Care Matters: When pruning roots in Step 2, focus on cutting only the most problematic ones—those longer than 12 inches or circling the root ball. I've found that using clean, sharp pruners makes all the difference in minimizing damage. For larger trees, you might need to make two or three shallow cuts around the root ball to loosen it without severing major roots completely. This gradual approach helps maintain the tree's stability during the move.
Proper Planting Position: In Step 3, it's easy to overlook the importance of planting depth. The top of the root ball should be level with the surrounding soil—burying the trunk too deeply can lead to rot or girdling roots. I always use a level or a straight board to check the depth before backfilling. For extra security, you can create a small mound of soil around the base to help direct water toward the roots, as mentioned in the instructions.
Post-Transplant Support: The first month after transplanting is critical for your cherry tree's recovery. During this time, I recommend checking the soil moisture at a depth of 2 inches every few days. If it feels dry, it's time to water deeply. Remember that the tree's watering needs will decrease after the first month, but consistent moisture is essential for root establishment during the first year. The 6-8 week waiting period before fertilizing is also important—this allows the tree to focus on root growth without competing with new foliage.
Pro Tips for Transplanting Cherry Tree
- Moving a cherry tree without causing stress requires careful planning and attention to detail. These practical tips w...
- Timing is Everything: The 24-hour preparation period before transplanting is crucial. This allows the soil to settle ...
- Root Care Matters: When pruning roots in Step 2, focus on cutting only the most problematic ones—those longer than 12...
Frequently asked questions
Got questions about transplanting your cherry tree? You’re not alone! Here are some of the most common concerns—plus expert-backed answers to help you succeed.
When is the best time to transplant a cherry tree?
The ideal window is late fall to early spring (dormant season), when the tree isn’t actively growing. Avoid transplanting during extreme heat or frost. Young trees (under 3 years) adapt faster than mature ones—so act sooner rather than later!
How big of a hole should I dig for transplanting?
Dig a hole twice as wide as the root ball and just as deep. This gives roots room to spread without bending. For mature trees, consider amending the soil with compost or native soil to reduce shock. Pro tip: Loosen the sides of the hole to encourage root growth outward!
How often should I water after transplanting?
Water deeply every 2–3 days for the first 2 weeks, then taper to once a week (adjust for drought). Overwatering can suffocate roots—check soil moisture 2 inches down. Mulch the base (3–4 inches) to retain moisture and protect roots from temperature swings.
Can I transplant a cherry tree in summer?
It’s risky but possible if you take precautions: Transplant on a cloudy day, prune 1/3 of the canopy to reduce stress, and provide daily shade for 2–3 weeks. Summer transplanting often leads to leaf scorch—monitor closely and water at the base, not the leaves.
What if my cherry tree’s leaves turn yellow after transplanting?
Yellowing leaves are often a sign of transplant shock or nutrient deficiency. Check for:
- Overwatering (roots need oxygen!)
- Poor drainage (amend soil if needed)
- Nitrogen deficiency (apply a balanced fertilizer 6–8 weeks post-transplant)
Should I prune before or after transplanting?
Prune before transplanting to reduce stress: Trim 1/3 of the canopy and remove any dead/diseased branches. Avoid heavy pruning after transplanting—focus on root care first. Light pruning can wait until early spring to encourage new growth.
Wrapping up and next steps
Transplanting a cherry tree doesn’t have to be stressful—with the right preparation, timing, and care, you can give your tree a thriving new home! 🌱 Remember, patience and attention to root health are key, whether you’re moving a young sapling or an established tree.
Now that you’re equipped with the know-how, there’s only one step left: roll up your sleeves and get planting!
🌿 Next Steps:
- Mark your calendar for the ideal transplanting window (early spring or fall).
- Gather your tools and prep the new location before the big day.
- Monitor your tree’s progress and celebrate its growth—you’ve got this!