Trees
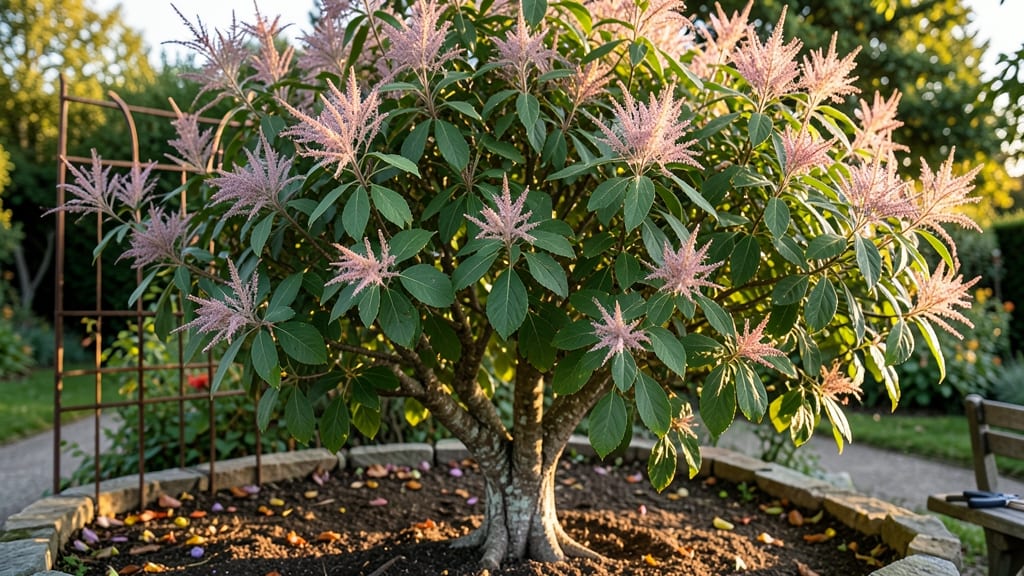
Growing smoke tree leaves from seed starts with a layered chill technique—the secret to breaking dormancy and getting those feathery plumes sprouting in weeks instead of months. 🌱 I’ve struggled with slow germination until I discovered how cold stratification mimics natural conditions, speeding up the process dramatically.
The right soil mix and timing make all the difference for Cotinus seedlings that develop into the striking purple foliage you crave.
Once you’ve mastered the chill method, maintaining healthy smoke tree leaves becomes straightforward—well-draining soil, full sun exposure, and minimal pruning keep those signature plumes abundant. The key is patience during the early stages, but the payoff is worth it: vibrant, layered foliage that transforms any landscape into a standout feature.
Ready to grow yours?
📚 In This Guide
- What you need
- Instructions
- Tips and common mistakes
- Wrapping up and next steps
What you need
- ● Smoke tree seeds – 10-20 seeds (ensure they’re fresh for best germination rates).
- ● Well-draining potting mix – 1 bag (12-16 qt) (use a blend of peat moss, perlite, and sand for optimal aeration).
- ● Seed-starting trays or small pots – 10-20 individual cells or pots (3-4 inches deep).
- ● Grow lights or sunny windowsill – 12-16 hours of light daily (LED grow lights work wonders!).
- ● Misting bottle – To keep soil consistently moist without drowning seeds.
- ● Plastic wrap or humidity dome – To create a mini greenhouse effect.
- ● Gloves – Protect your hands from prickly seeds or soil.
- ● Small hand trowel – For gentle soil adjustments.
- ○ Heat mat (optional) – 70-75°F range speeds up germination.
- ● Fertilizer (balanced, low-nitrogen) – Diluted liquid fertilizer (5-5-5 ratio) once seedlings sprout.
- ● Smoke tree cutting (alternative) – If propagating, a 4-6 inch healthy stem with nodes.
- ○ Rooting hormone (optional) – Boosts success for cuttings.
Step-by-Step instructions for smoke tree germination using layered chill
Here’s how to break the dormancy barrier and get smoke trees growing strong in just weeks.
🌱 Step 1: Collect and Prepare Seeds for Stratification
Harvest smoke tree seeds in late summer or fall when the seed pods turn brown and papery. Extract the seeds carefully—they’re tiny and flat, resembling miniature beans. I like to soak them in lukewarm water for 12 hours first to soften the outer coating, which speeds up the process later.
After soaking, spread the seeds on a paper towel and place them in a sealed plastic bag. Store them in the refrigerator for 4-6 weeks—this mimics winter conditions and triggers germination. Check weekly for mold; if you see any, toss the batch and start fresh.
⏰ Step 2: Layer Chill with Moisture Control
After the initial cold period, remove the seeds from the fridge and place them between two damp paper towels. Fold the towels to create a sealed packet, then store them in a cool, dark location (around 40-45°F) for another 2-3 weeks. This layered chill technique mimics natural seasonal shifts and ensures consistent germination.
Keep the towels moist but not soggy—squeeze out excess water if they feel damp to the touch. You’ll see the first signs of germination when tiny white roots appear, usually within 10-14 days. This is your cue to move to the next step.
🌿 Step 3: Plant Germinated Seeds in Fast-Draining Mix
Fill small pots (about 2-3 inches deep) with a light, fast-draining mix—I blend equal parts perlite and peat moss for smoke trees. Press the mix down gently to create a firm surface, then plant the germinated seeds ¼ inch deep. Space them 1 inch apart to avoid overcrowding.
Water lightly from the bottom to avoid disturbing the seeds. Place the pots in a warm, bright location (around 65-70°F) but out of direct sunlight. You’ll notice the first true leaves emerge in 3-4 weeks—this is when you can gradually introduce them to more light.
☀️ Step 4: Gradually Acclimate to Full Sun
Once seedlings have 2-3 sets of true leaves, move them to a spot with morning sun and afternoon shade for 1 week. This slow transition prevents leaf scorch. After a week, increase their sun exposure by 1 hour daily until they’re getting 6+ hours of direct light.
Watch for leggy growth—a sign they’re stretching for light. If this happens, move them closer to the light source or supplement with a grow light. Smoke trees thrive in full sun, but their first season needs careful adjustment to avoid stress.
🪴 Step 5: Transplant to Larger Containers or Garden
When seedlings reach 4-6 inches tall (usually 8-10 weeks after sowing), transplant them to 5-inch pots or directly into the garden. Choose a location with well-draining soil and full sun exposure. Dig holes twice as wide as the root ball to encourage spreading roots.
Water deeply after transplanting to settle the soil. Mulch around the base with 1-2 inches of organic mulch to retain moisture and regulate soil temperature. Smoke trees are drought-tolerant once established, but young plants need consistent moisture to root well.
Tips & tricks for perfect smoke tree germination
Fast germination isn't just about patience—it's about precision. Here's how to optimize every step of the layered chill process for reliable smoke tree growth.
Timing Secret: That initial 12-hour lukewarm soak in Step 1 is your speed boost—it softens the seed coat without overhydrating. Use a kitchen scale to measure exactly 1 cup of water per 100 seeds to maintain consistent moisture. Too much water can trigger mold growth during the cold stratification phase. I've found that using distilled water (instead of tap) reduces mineral buildup that might inhibit germination.
Temperature Matters: The 40-45°F range in Step 2 is critical for breaking dormancy, but don't assume all refrigerators maintain this perfectly. Place a thermometer inside with your seeds to verify—some fridges run cooler or hotter in different compartments. For the cool dark location after stratification, a basement or root cellar works best, but if you're using a closet, add a small fan to prevent stagnant air buildup that can cause mold.
Germination Visual Cues: When you see those first white roots in Step 2, they'll appear within 10-14 days of the layered chill period. Look for roots that are ¼ inch long or more—this is your signal to move to planting. I've seen some seeds germinate earlier (as soon as 7 days), but don't rush them. Wait until you see consistent root development across at least 50% of your seeds before proceeding to Step 3.
Fast-Draining Mix Pro Tip: For the 2-3 inch deep pots in Step 3, I recommend using 70% perlite and 30% peat moss instead of equal parts. The increased perlite content prevents compaction and improves drainage, which smoke tree seedlings desperately need. Press the mix firmly but don't pack it down—you want just enough resistance to support the tiny seeds without creating air pockets that could suffocate them.
Pro Tips for Smoke Tree Leaves
- Fast germination isn't just about patience—it's about precision.
- Timing Secret: That initial 12-hour lukewarm soak in Step 1 is your speed boost—it softens the seed coat without overhydrating.
- Temperature Matters: The 40-45°F range in Step 2 is critical for breaking dormancy, but don't assume all refrigerators maintain this perfectly.
Frequently asked questions
Got questions about growing smoke tree leaves using the layered chill technique? You’re not alone! Here are some of the most common queries—plus quick answers to keep your project on track.
Why do smoke tree leaves need a layered chill?
The layered chill technique mimics natural winter conditions, breaking seed dormancy and boosting germination rates. Smoke trees (like Cotinus species) often have hard outer coats—this method softens them gently, ensuring faster and more reliable sprouts. Think of it as a cozy blanket for your seeds!
How long should I chill smoke tree seeds?
Most smoke tree seeds thrive with 4–8 weeks of chilling in the fridge (or a cold frame outdoors). Check them weekly—if moisture evaporates, spritz lightly with water. Over-chilling can cause mold, so err on the shorter side if your climate is damp. Patience pays off!
Can I reuse the same moist paper towels for multiple batches?
Nope! Moist paper towels should be single-use to avoid bacterial growth or mold. After removing seeds, discard the towels and start fresh. Pro tip: Label each batch with the date to track chilling progress—organization = fewer headaches!
What if my smoke tree leaves don’t sprout after chilling?
Don’t panic! Try these fixes:
- Check viability: Soak a few seeds in warm water for 24 hours—if they sink, they’re likely viable.
- Adjust warmth: Move the tray to a warm spot (70–75°F) after chilling to kickstart germination.
- Try scarification: Lightly sand the seed coat with fine-grit sandpaper before re-chilling.
Are there alternatives to the layered chill method?
Yes! If you’re short on time, try:
- Stratification in soil: Plant seeds in pots, cover with mulch, and leave outdoors in winter.
- Hot water soak: Boil water, let cool to 180°F, soak seeds for 24 hours (use caution—this can damage some seeds).
- Commercial germination aids: Products like Gibberellic Acid can help, but follow instructions carefully.
Wrapping up and next steps
Growing smoke tree leaves from seed using the layered chill technique is a rewarding journey that blends patience with science! By mimicking nature’s cycles—moisture, warmth, and cold—you’ve unlocked a faster, more reliable way to nurture these stunning plants.
Whether you’re a seasoned gardener or just starting out, your dedication will soon pay off with vibrant, healthy smoke trees gracing your space.
Now that you’re armed with the right knowledge, take the next step: gather your supplies and start the process this season. Watch those tiny seeds transform into lush foliage—your green thumb is about to shine! 🌱✨