Pruning
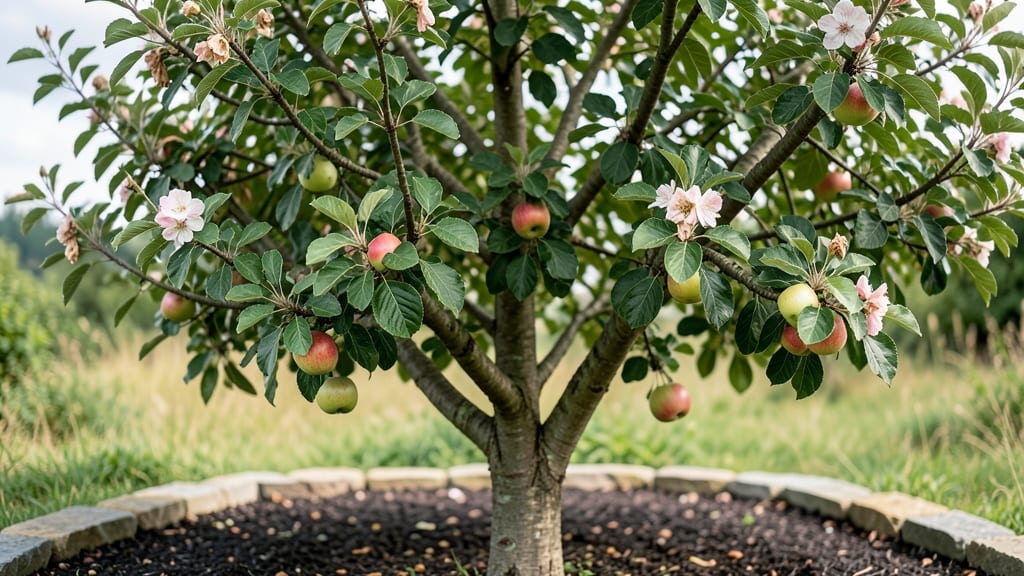
Shaping an apple tree isn't just about cutting branches—it's about sculpting a living work of art that rewards you with fruit and beauty for decades. 🌟 I've spent years transforming wild, tangled apple trees into structured, productive specimens, and the difference is night and day: cleaner canopies, easier harvesting, and branches that don't snap under winter ice.
The key is working with the tree's natural growth patterns, not against them. You'll need sharp pruners, a sturdy ladder, and a clear plan for your desired shape—whether it's the classic central leader, open vase form, or dramatic espalier against a fence.
Most people make two big mistakes: pruning too late in the season or cutting too much at once. Start in late winter when the tree is dormant, and never remove more than 25% of the foliage in one go.
By summer, you'll see the results: a tree with strong structure that supports heavy fruit loads without breaking. The branches will spread evenly, catching sunlight and air circulation to prevent disease.
Even better, shaped trees are easier to maintain—no more wrestling with unruly limbs or climbing ladders to reach the top fruit. This isn't just pruning; it's creating a tree that works as hard as you do.
Works for both young saplings and mature trees, though established trees may need gradual reshaping over several seasons. The payoff? A tree that looks intentional, produces reliably, and becomes the centerpiece of your landscape. Let's get those pruners ready—your tree's future starts now.
📚 In This Guide
- What you need
- Instructions
- Tips and common mistakes
- Wrapping up and next steps
What you need
- ● Pruning shears: Bypass pruners (sharp, clean, and not anhedonda type) for cuts up to ½-inch thick.
- ● Loppers: 1 pair (for branches ½-inch to 2 inches thick). Look for ratcheting or bypass-style for precision.
- ● Pruning saw: 1 curved-tooth saw (for branches thicker than 2 inches). A folding saw saves space.
- ● Gloves: 1 pair of cut-resistant, breathable gloves (e.g., leather or synthetic mesh).
- ● Disinfectant: 70% isopropyl alcohol or a pruning sealant (like Tanglefoot Tree Wound Pruning Sealer) to prevent disease.
- ○ Extension pole: Optional but helpful—a 6–10 ft telescoping pole with a saw attachment for high branches.
- ● Safety glasses: 1 pair to protect against debris.
- ● Work boots: Sturdy, slip-resistant shoes (apple trees can be tall!).
- ● Ladder (if needed): A stable, non-slip ladder (or a harness system for very tall trees).
- ● Weather check: Prune on a dry, calm day—avoid rain or wind to prevent sap splatter and slips.
- ● Tree ID: Confirm your tree is an apple tree (not crabapple or another fruit tree) for proper pruning techniques.
- ● 🔥 Sharpen your tools! Dull blades tear wood, inviting disease. Hone shears with a file or sharpening stone before starting.
- ● ✨ Bag it up: Bring a heavy-duty trash bag to collect pruned branches—compost them away from your tree to avoid reinfesting pests.
- ● 🌡️ Timing matters: For best results, prune in late winter/early spring (before buds swell) or summer (after harvest).
Step-by-Step guide to shaping an apple tree
Transform your apple tree into a picturesque, productive centerpiece with these proven pruning techniques.
✂️ Step 1: Prune in Late Winter for Structure
Start your shaping in late winter (just before buds swell) when the tree is dormant. This is the best time to establish your tree's framework because there's no risk of disease transmission from fresh cuts. Grab your pruning shears and loppers—I always sterilize them with rubbing alcohol first to prevent spreading any lingering pathogens.
Focus on removing dead, diseased, or crossing branches first. These are your priorities because they weaken the tree and compete for energy. Make clean cuts at a 45-degree angle just outside the branch collar (the swollen area where the branch meets the trunk). This ensures proper healing and prevents water from pooling in the wound.
✂️ Step 2: Thin Out Branches for Airflow
Next, thin out about 20-30% of the tree's branches to improve airflow and sunlight penetration. You want to create an open-center shape where the branches form a vase-like structure. Remove branches that grow inward or rub against each other—these will eventually damage the bark and invite pests.
Look for branches that are growing straight up or down; these are called water sprouts and should be pruned back to a strong lateral branch. You’ll know you’re doing it right when you can see light filtering through the canopy. This step is crucial for fruit production—apples need sunlight to ripen properly.
✂️ Step 3: Shape the Canopy in Early Summer
In early summer, after the tree has finished flowering but before new growth hardens off, do a lighter pruning to refine the shape. This is when you’ll focus on heading back (shortening) the remaining branches to encourage bushier growth. Cut just above a leaf bud or lateral branch to promote new shoots.
Pay attention to the leader (the central vertical branch). If it’s growing too tall or leaning, you may need to prune it back to encourage a stronger, more balanced structure. Avoid over-pruning here—you’re just making minor adjustments to maintain the shape you’ve established. Think of this as a trim, not a major overhaul.
✂️ Step 4: Clean Up in Late Fall
In late fall, after the leaves have dropped but before the first hard frost, do a final cleanup. Remove any suckers (shoots growing from the base or roots) and deadwood that may have appeared during the growing season. This keeps the tree tidy and reduces hiding spots for pests.
Now’s also the time to sterilize your tools again and sharpen them if needed. Store them in a dry place for next year. If you notice any signs of disease or pest damage during this cleanup, address it immediately—prevention is easier than cure. A well-maintained tree will reward you with better fruit production and a stunning silhouette year-round.
🌿 Step 5: Monitor and Adjust Year-Round
Throughout the year, keep an eye on your tree’s growth. If you notice branches growing too aggressively in one direction, prune them back slightly in early spring or late summer to maintain balance. Avoid heavy pruning during these times—it can stress the tree and reduce fruit set.
Here’s the thing—shaping an apple tree is an ongoing process. Every year, you’ll refine the shape a little more, and with time, your tree will develop into a strong, productive, and beautiful part of your landscape. I promise, the more you work with it, the easier it gets to recognize what needs attention.
Tips & tricks for perfect apple tree shaping
Here's what I learned from years of shaping apple trees—these tricks will help you avoid common mistakes and create a healthier, more beautiful tree.
Tool Preparation: Always sterilize your pruning shears and loppers with rubbing alcohol before you start in late winter. I've seen so many trees get infected because people skipped this step. Clean tools prevent spreading disease from one cut to the next, especially when dealing with dead or diseased branches in Step 1. Keep a small bottle of rubbing alcohol in your tool bag for quick sterilization between cuts.
Branch Selection in Step 2: When thinning out 20-30% of branches, focus on removing branches that are growing inward or crossing others. These are the ones that will eventually damage the bark and create entry points for pests. I like to use the "light test"—if you can see light filtering through the canopy after pruning, you're doing it right. This open-center shape isn't just about looks; it's about maximizing sunlight exposure for better fruit production.
Summer Pruning Technique: In early summer during Step 3, when heading back branches, cut just above a leaf bud or lateral branch. This small detail makes a huge difference in how your tree regenerates. I've made the mistake of cutting too close to the trunk—it creates larger wounds that take longer to heal. Always look for that small bud or branch to cut above, and you'll encourage healthier new growth.
Year-Round Monitoring: Don't wait for the scheduled pruning times to notice problems. Keep an eye on your tree throughout the year—especially in early spring and late summer. I've caught aggressive branch growth early by doing quick visual checks every few weeks. This proactive approach prevents small issues from becoming major problems that require drastic pruning later.
Pro Tips for Shape Apple Tree
- Here's what I learned from years of shaping apple trees—these tricks will help you avoid common mistakes and create a...
- Tool Preparation: Always sterilize your pruning shears and loppers with rubbing alcohol before you start in late wint...
- Branch Selection in Step 2: When thinning out 20-30% of branches, focus on removing branches that are growing inward ...
Frequently asked questions
Got questions about shaping your apple tree for year-round beauty? Here are some of the most common ones—plus quick, practical answers to help you prune like a pro!
When is the best time to shape an apple tree?
The ideal time is late winter or early spring, just before buds break. This timing minimizes stress on the tree and reduces disease risks. Avoid heavy pruning in fall, as wounds may not heal before winter. For young trees, light shaping can also be done in summer to encourage new growth.
Can I shape an apple tree in winter?
Yes, but only in mild climates or during dormant season (when temperatures stay above freezing). In freezing winters, avoid pruning unless absolutely necessary—cold stress can harm the tree. If you must prune in winter, do it on warmer days and keep tools clean to prevent disease spread.
How do I know if I’m pruning too much?
Remove no more than 25% of the tree’s canopy in a single session. Signs of over-pruning include excessive water sprouts, weak growth, or yellowing leaves. Focus on removing dead, diseased, or crossing branches first—this keeps the tree healthy while shaping it naturally.
What’s the difference between shaping and thinning out an apple tree?
Shaping involves structural pruning to create a balanced form (e.g., central leader or open vase), while thinning removes select branches to improve airflow and light penetration. Both techniques work together: shape first for structure, then thin to optimize fruit production and tree health.
Are there alternatives to traditional pruning for shaping?
Yes! Try topiary for artistic designs (great for dwarf varieties) or espalier training to grow trees flat against walls or fences. For organic growers, hand-pruning with sharp shears and minimal cuts can reduce stress. Always research the method for your tree’s specific needs!
What should I do if my apple tree bleeds sap after pruning?
Sap bleeding (especially in maples, but common in some apple varieties) is normal and harmless. It won’t hurt the tree, but you can reduce it by pruning on drier days or applying pruning sealant (optional) to larger cuts. Focus on clean cuts at the branch collar for the best healing.
Wrapping up and next steps
Shaping your apple tree isn’t just about aesthetics—it’s a year-round investment in healthier fruit, better airflow, and stunning seasonal beauty. 🌳 With the right tools, timing, and techniques, you can transform your tree into a showstopper while ensuring a bountiful harvest.
Whether you’re a seasoned gardener or just starting, every snip brings you closer to that perfect, picturesque tree!
Ready to take the next step? Grab your pruners, mark your calendar for late winter or early spring, and start shaping your apple tree today. Your future harvest—and your neighbors’ envy—will thank you!