Pruning
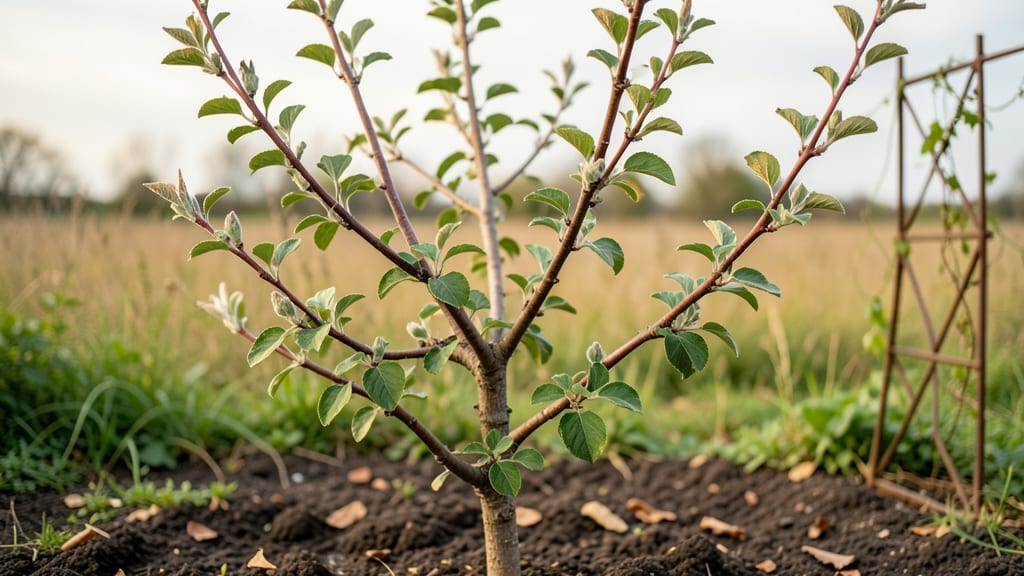
Pruning apple tree shoots is the secret to turning spindly growth into a sturdy framework that bears fruit for decades. 🌱 I learned this the hard way after my first sapling grew into a tangled mess—until I discovered the right cuts transform weak shoots into strong branches.
The key isn’t just trimming; it’s shaping the tree’s future while it’s still small.
Start with clean, sharp pruners and focus on three goals: removing dead wood, opening the center for airflow, and encouraging outward growth. Young shoots need less drastic cuts than mature branches—think of it as sculpting a living work of art.
Most pruning happens in late winter or early spring, but you can do light maintenance any time the tree isn’t flowering.
What you’ll end up with is a tree that grows taller with fewer weak limbs, produces more blossoms, and resists disease better. The first year after proper pruning, you’ll notice thicker stems and fewer broken branches when storms hit.
Plus, the fruit that follows will be larger and easier to reach—no more wrestling with overgrown limbs.
This works for dwarf, semi-dwarf, and standard apple trees alike, whether you’re growing in a backyard or a community orchard. The principles stay the same, even if your climate demands slight timing adjustments. Let’s get those pruners ready!
📚 In This Guide
- What you need
- Instructions
- Tips and common mistakes
- Wrapping up and next steps
What you need
- ● Pruning shears: Bypass pruners (sharp, clean, and disinfected with rubbing alcohol or bleach). Size: 6–8 inches for small branches.
- ● Loppers: For thicker shoots (½–1½ inches in diameter). Look for: Long handles (20+ inches) for leverage.
- ● Hand saw: Pruning saw with a fine-tooth blade for branches >1½ inches thick.
- ● Gloves: Heavy-duty gardening gloves (cut-resistant for safety).
- ● Disinfectant: 1 part bleach to 9 parts water (to sterilize tools between cuts).
- ○ Pruning sealant: Optional but helpful for large wounds (look for latex-based or tree wound paint).
- ● Ladder or step stool: Sturdy and tall enough to reach the tree’s canopy safely.
- ● Bucket or bag: For collecting pruned branches (line with a trash bag for easy cleanup).
- ● Sharpie or marker: To label cuts if training young trees.
- ● Pole pruner: Extendable shears for high branches (great for tall trees!).
- ● Pruning rope: To support weak branches temporarily.
- ● Tree pruning guide: A branching chart or app (like iTree) for visual reference.
- ● Safety glasses: Protect your eyes from debris.
- ● First-aid kit: Just in case (pruning can be rough on the hands!).
Step-by-Step guide for pruning apple tree shoots
Pruning young apple tree shoots is where you build a strong framework for years of fruit. Here's how to shape your tree without stressing it.
✂️ Step 1: Identify and Remove Weak or Crossing Branches
Start by examining your tree for shoots growing inward or rubbing against others—these compete for energy and create entry points for disease. Use sharp pruning shears to make clean cuts at a 45-degree angle, about ¼ inch above an outward-facing bud. This ensures the branch heals properly and new growth emerges in the right direction.
Look for shoots thinner than a pencil or those growing straight up without any side branches. These are "water sprouts" that drain energy from fruit production. Snip them off at the base. I always prune on a dry, sunny day—fresh cuts heal faster in good light and airflow.
✂️ Step 2: Thin Out Overcrowded Shoots for Airflow
Apple trees need good airflow to prevent fungal diseases like apple scab. If you have 4 or more shoots growing from the same point, select the 2-3 strongest (those with thick stems and outward growth) and remove the rest. Cut just above a bud that faces the outside of the tree.
Resist the urge to leave too many branches—each one competes for sunlight and nutrients. You'll see healthier, more vigorous growth in the following season when the tree isn't overburdened. I like to step back every few cuts to visualize the tree's shape and ensure light can reach the center.
☀️ Step 3: Shape the Tree for Sunlight Access
Open the center of the tree by removing any branches growing directly inward. Aim for a vase-like shape where sunlight can reach all sides. For young trees, I focus on creating a main scaffold of 3-5 well-spaced branches that form the tree's skeleton.
Cut back any lateral branches that are growing too close to the trunk—these often become weak and crowded. The goal is to create a sturdy structure that can support fruit without breaking. You'll know you're on the right track when you can see light filtering through the center of the tree.
⏰ Step 4: Prune at the Right Time for Maximum Growth
For young apple trees, the best time to prune shoots is late winter or early spring, just before buds swell but before new growth begins. This timing encourages strong, healthy growth without risking disease entry points. Avoid pruning in fall—wounds take longer to heal and are more vulnerable to infection.
If you must prune in summer, do it after harvest to allow the tree to recover. Never remove more than ¼ of the tree's canopy in one season—this stresses the tree and reduces fruit production. I always use sterilized tools to prevent spreading disease between cuts.
🌱 Step 5: Monitor and Adjust Growth Through the Season
After pruning, keep an eye on new shoots that emerge from the pruning cuts. If any grow too vigorously, trim them back to ½ their length to encourage branching. This creates a bushier tree with more fruiting sites.
Watch for suckers—shoots growing from the base of the tree or the graft union. These drain energy from the main tree. Remove them immediately by cutting at the base. Regular monitoring ensures your tree stays healthy and productive, with strong shoots that will bear fruit for years to come.
Tips & tricks for pruning apple tree shoots
Building a strong apple tree starts with smart pruning—here's how to avoid common mistakes and create a framework that will produce fruit for years.
The 45-Degree Angle Secret: When you make those clean cuts in Step 1, the 45-degree angle isn't just for looks—it helps water run off the wound instead of pooling. This prevents rot and encourages faster healing. I always visualize slicing the branch like a pie wedge, with the wider part facing away from the trunk. The ¼-inch above the outward bud is crucial too—this ensures new growth emerges in the right direction, away from the center.
Visualizing Your Tree's Shape: In Step 3, when you're shaping for sunlight access, step back every 5-10 cuts to visualize the vase-like shape. Hold your pruners at arm's length and look for gaps where light should filter through. You're aiming for that "open center" look where sunlight can reach all branches. Think of it like creating a window frame—you want light pouring through the middle. If you're unsure, snap a photo before you start pruning to compare with your progress.
Timing is Everything: That late winter/early spring window in Step 4 is your best bet for pruning, but I get it—sometimes life gets in the way. If you must prune in summer, always do it after harvest and never remove more than that ¼ of the canopy. The tree needs time to recover before storing energy for next year's fruit. Pro tip: If you're pruning in summer, do it on a cloudy day to reduce stress on the tree. The cooler temps help wounds heal faster.
Tool Care Prevents Disease: Sterilizing your tools between cuts in Step 4 isn't just about cleanliness—it's about saving your tree. I keep a small bottle of rubbing alcohol handy and wipe down my pruners after every 3-4 cuts, especially when moving between different parts of the tree. This simple step prevents spreading fungal spores that could lead to apple scab. Sharp tools matter too—dull blades tear tissue instead of making clean cuts, creating bigger wounds that heal slower.
Pro Tips for Apple Tree Shoots
- Building a strong apple tree starts with smart pruning—here's how to avoid common mistakes and create a framework tha...
- The 45-Degree Angle Secret: When you make those clean cuts in Step 1, the 45-degree angle isn't just for looks—it hel...
- Visualizing Your Tree's Shape: In Step 3, when you're shaping for sunlight access, step back every 5-10 cuts to visua...
Frequently asked questions
Got questions about nurturing those fresh apple tree shoots? You’re not alone! Here are answers to the most common queries—whether you’re a first-time pruner or looking to refine your skills.
When is the best time to prune apple tree shoots for optimal growth?
The ideal time is late winter or early spring (before buds swell) or summer after harvest. Avoid pruning in fall—it risks disease spread. For young trees, focus on shaping in winter; established trees can handle light summer trims to encourage fruit production. Pro tip: If pruning in summer, do it on a dry, calm day to reduce stress on the tree.
How do I tell the difference between healthy shoots and dead/diseased ones?
Healthy shoots are green, firm, and flexible with smooth bark. Dead/diseased shoots are brown, brittle, or mushy when touched, with possible oozing sap or fungal growth. Cut these at a <45° angle just above a outward-facing bud. If you’re unsure, scrape the bark—green underneath means it’s alive! Warning: Never prune during wet weather to avoid spreading pathogens.
Will pruning apple tree shoots reduce next year’s fruit yield?
Not if done correctly! Pruning encourages fruit production by improving airflow and sunlight penetration. Remove only water sprouts (vertical shoots) or crowded branches—never more than 25% of the tree’s canopy in one season. Young trees benefit most from strategic pruning, while mature trees may need thinning cuts to balance growth and fruit.
What can I do if my apple tree shoots keep growing back after pruning?
Stubborn regrowth often means the cut was too close to the trunk or the shoot was only partially removed. Make sure cuts are clean and just above a bud (about ¼” from the branch collar). Use pruning sealant only on large cuts (>2” diameter) to prevent disease. For aggressive regrowth, try topping (cutting back to a strong lateral branch) or apply a growth regulator like hydrogen peroxide spray.
Are there alternatives to pruning if I don’t have the right tools?
Yes! For small shoots, use sharp scissors or garden shears (sterilized with rubbing alcohol). Avoid tearing branches—this invites disease. If you lack pruning paint/sealant, a mixture of 1 part beeswax to 1 part turpentine works in a pinch. For large branches, borrow a friend’s saw or visit a local hardware store for rentals. Safety first: Never use dull tools or stretch to reach—use a sturdy ladder instead.
Wrapping up and next steps
Pruning your apple tree shoots might seem like a daunting task, but with the right knowledge and tools, you can transform your tree into a thriving, fruit-bearing powerhouse! 🌱 The key takeaway? Timing, technique, and regular care make all the difference—whether you're shaping young branches or maintaining an established tree.
By following these steps, you’ll encourage stronger growth, better airflow, and a bountiful harvest.
Ready to give your apple tree the love it deserves? Roll up your sleeves and start pruning today! For even more confidence, consider consulting a local arborist or joining a gardening community to share your progress. Happy pruning—your future apple harvest awaits! 🍏✨