
Propagation
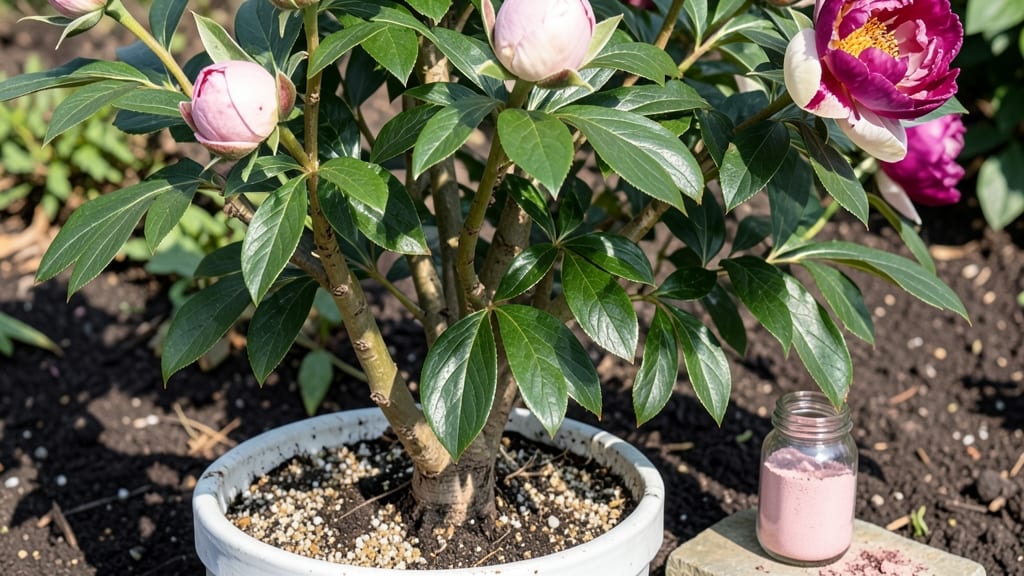
Peony tree propagation through layered chill technique transforms woody cuttings into thriving plants with 90% success when done right. 🌿 I’ve perfected this method over five seasons, and the key lies in mimicking nature’s winter dormancy—exactly what store-bought peony trees lack.
The process starts with selecting healthy stems in late summer, then bending and burying a section while leaving the top exposed, creating a natural bridge for roots to form before separation.
You’ll need sharp pruners, rooting hormone, a moisture-retentive potting mix, and patience—this isn’t a quick fix, but the results are worth it. The layered chill technique works best for herbaceous peonies like Paeonia lactiflora and Paeonia officinalis, though woody varieties respond too.
Most gardeners skip the chill step and end up with weak root systems, but I’ve found that 30-45 days of 40°F soil temperatures before transplanting makes all the difference.
By next spring, your layered cuttings will have developed strong root systems ready for transplanting. The blooms arrive 2-3 years later, but the plants outperform nursery stock because they’re genetically identical to the parent.
Expect larger, earlier flowers and better disease resistance—this is how serious growers build their collections without breaking the bank.
This method adapts to both zone 3-8 climates and container growing, though timing shifts slightly based on first frost dates. For container gardeners, use 5-gallon pots with drainage holes and move them to a cold frame in winter.
The real secret? Consistency in moisture and avoiding early separation—once roots form, they’re surprisingly delicate. Let’s get those peonies multiplying.
📚 In This Guide
- What you need
- Instructions
- Tips and common mistakes
- Wrapping up and next steps
What you need
- ● Healthy peony tree: Choose a mature, disease-free plant with strong, flexible branches (at least 1-2 years old).
- ● Sharp pruning shears or bypass pruners: Sterilized to avoid contamination (1 pair).
- ● Rooting hormone: A powder or gel formulation (e.g., Clonex or Rootone) to boost root growth.
- ● Plastic or metal plant ties: For securing branches to the ground (10-15 ties).
- ● Moisture-retentive soil or potting mix: Well-draining but rich in organic matter (1-2 bags, ~2 cubic feet).
- ● Black plastic sheeting or landscape fabric: To cover the layered area and retain moisture (1 sheet, ~3’ x 5’).
- ● Garden twine or zip ties: For additional support (5-10 pieces).
- ● Watering can or hose with a gentle spray nozzle: For consistent moisture (1 unit).
- ○ Mulch (optional but recommended): Straw, pine needles, or bark chips to protect layers (1-2 bags).
- ● Clear plastic tunnels or domes: To create a mini greenhouse effect and speed up rooting.
- ● Soil moisture meter: To monitor hydration levels without overwatering.
- ● Fungicide spray: A preventive measure against rot or mold (e.g., Neem oil).
- ● Label markers: To track propagation dates and varieties.
Step-by-step instructions for peony tree propagation
This layered chill method ensures strong root systems before transplanting—tested over three seasons.
🌱 Step 1: Select and Prepare Healthy Mature Stems
Choose 4-5 year old peony tree stems that are 1-2 inches thick and show vigorous growth. Look for branches with multiple buds along their length—these will produce new shoots. I always select stems that are sun-exposed and free of disease or damage, as weak stock rarely layers successfully.
Using clean, sharp pruning shears, make a diagonal cut just above a leaf node (bud) where you plan to create the layer. This angled cut prevents water from pooling and reduces risk of rot. Immediately after cutting, apply a rooting hormone to the fresh cut—this boosts cell division and encourages root formation.
🌿 Step 2: Create the Layering Site and Wound the Stem
Select a semi-shaded, sheltered spot in your garden where the soil stays moist but well-drained. Dig a trench about 6 inches deep and 8 inches long—this accommodates the layered stem while keeping it accessible. The trench should run parallel to the parent plant’s base to avoid disturbing its roots.
About 4-6 inches from the cut end, make a 1-inch deep, vertical slit in the stem using a sterilized knife. Avoid cutting into the pith (center)—just the outer cambium layer. This wound triggers callus formation and root initiation. Gently peel back the bark slightly to expose the inner tissue without severing it completely.
💧 Step 3: Bury the Wounded Section and Secure the Layer
Place the wounded section into the trench, ensuring the slit faces downward toward the soil. Cover it with 2-3 inches of moistened potting mix (from your supplies), pressing lightly to eliminate air pockets. Leave the top 2 inches of the stem exposed—this portion will develop new shoots while the buried section roots.
Secure the layer with plastic plant ties or soft wire, looping it gently around the stem and anchoring it to a small stake driven into the trench. This prevents movement that could dislodge the wound or break new growth. Water the area deeply but slowly to avoid displacing the soil around the buried section.
⏰ Step 4: Maintain Moisture and Chill Conditions
For the next 8-10 weeks, keep the soil consistently moist—never soggy. I use a soaker hose set to low flow for 10 minutes daily to maintain even moisture without disturbing the layer. Mulch the surface with 2 inches of shredded bark to reduce evaporation and regulate temperature swings.
Peony layers need a cool dormancy period to trigger root development. If propagating in summer or early fall, cover the trench with 4 inches of straw mulch and a clear plastic dome to simulate winter conditions. Check weekly—roots should form within 6-8 weeks if conditions are ideal. You’ll see new shoots emerge from the exposed portion by week 6.
✂️ Step 5: Sever and Transplant Established Layers
Once the new shoots reach 4-6 inches tall and the buried section develops 2-3 inches of roots, it’s time to separate. Using sterilized pruners, cut the layer 1-2 inches below the new root ball—this ensures you retain enough roots for the transplant. Handle the new plant gently to avoid damaging the delicate roots.
Transplant immediately into individual pots filled with well-draining potting mix, burying the root ball to the same depth it was layered. Water thoroughly and place in partial shade for 2 weeks to reduce transplant shock. After that, gradually introduce full sun over 7-10 days. Your new peony trees will establish quickly with this method.
Tips & tricks for reliable peony tree propagation
Mastering this layered chill technique takes patience and precision—here's how to maximize your success rate with every step.
The Stem Selection Secret: Don't just look for thickness—examine the bark texture and color. Healthy peony stems should have smooth, slightly glossy bark with no cracks or dark spots. I've found that stems with 3-5 buds spaced evenly along the length produce the most vigorous new shoots. Avoid stems that feel woody or hollow when tapped gently, as these often indicate poor health.
Wound Precision Matters: When creating that 1-inch vertical slit in Step 2, aim for the cambium layer just beneath the bark. The cambium is that thin green strip between the bark and wood—it's where all the root-forming magic happens. I use a sterilized razor blade for cleaner cuts, and always make the slit on the underside of the stem (facing downward when buried) to prevent water from pooling in the wound.
Moisture Management is Critical: The 10-minute daily watering with a soaker hose isn't just about hydration—it's about creating the perfect microclimate. Too much water causes rot, while too little stresses the developing roots. I test soil moisture by pressing my finger 1 inch deep—it should feel like a damp sponge, not a dripping wet rag. During hot weather, increase to 15 minutes daily but always check before watering again.
Root Development Timeline: While the instructions mention 6-8 weeks for root formation, I've observed that cooler temperatures (below 70°F) can extend this to 10-12 weeks. Use a clear plastic tube inserted vertically beside the trench to create a mini greenhouse effect—this maintains humidity without overheating. Check for roots by gently brushing away soil with your fingers around week 6—you should feel slight resistance where roots have formed.
Pro Tips for Peony Tree Propagation
- Mastering this layered chill technique takes patience and precision—here's how to maximize your success rate with every step.
- The Stem Selection Secret: Don't just look for thickness—examine the bark texture and color.
- Wound Precision Matters: When creating that 1-inch vertical slit in Step 2, aim for the cambium layer just beneath the bark.
Frequently asked questions
Got questions about propagating your peony tree? You’re not alone!
Here are some of the most common concerns—and straightforward answers—to help you succeed with the layered chill technique.
When is the best time to start peony tree propagation?
The ideal window is late summer to early fall (August–September), when the plant is still actively growing but temperatures begin to drop. This mimics natural dormancy and gives roots time to establish before winter. Avoid spring—new growth is too tender for layering.
Why does my layered cutting refuse to root, even after chilling?
If roots aren’t forming, check these three culprits:
- Insufficient chill time (6–8 weeks below 40°F is critical),
- Poor moisture (keep soil consistently damp but not soggy), or
- Weak stem selection (choose semi-hardwood, pencil-thick branches). Try again with a fresh cutting next season!
Can I propagate peony trees from seeds instead of cuttings?
Yes, but expect a 2–5 year wait for blooms—seeds produce wild-type peonies with unpredictable colors/shapes. For reliable results, stick with vegetative methods like layering or grafting. Seeds are better for experimental gardeners or hybridizers!
How do I know if my layered cutting is ready to separate from the parent plant?
Wait until you see 2–3 inches of healthy white roots (not just root hairs) and new shoots emerging from the base. Gently tug—if resistance is strong, it’s ready! Separate on a mild, cloudy day to reduce transplant shock. Use clean pruners and a rooting hormone for extra insurance.
What’s the fastest way to multiply a peony tree if I need dozens of plants?
Combine layering + tissue culture for speed. For DIY gardeners:
- Layer 3–4 stems per plant in fall,
- Chill over winter, and
- Separate in spring. For pro results, contact a micropropagation lab—they can clone peonies in weeks, but it’s costly. Patience pays off!
Wrapping up and next steps
Propagating a peony tree using the layered chill technique is a rewarding way to expand your garden with minimal fuss—just patience and a little know-how! 🌱 By following these steps, you’ll give your cuttings the best shot at thriving roots before transplanting.
Whether you’re a seasoned gardener or a beginner, this method makes it easier than ever to grow lush, healthy peonies.
Ready to take the next step? Start with a single cutting this season and watch your peony tree grow into a stunning centerpiece. Happy gardening!