
Trees
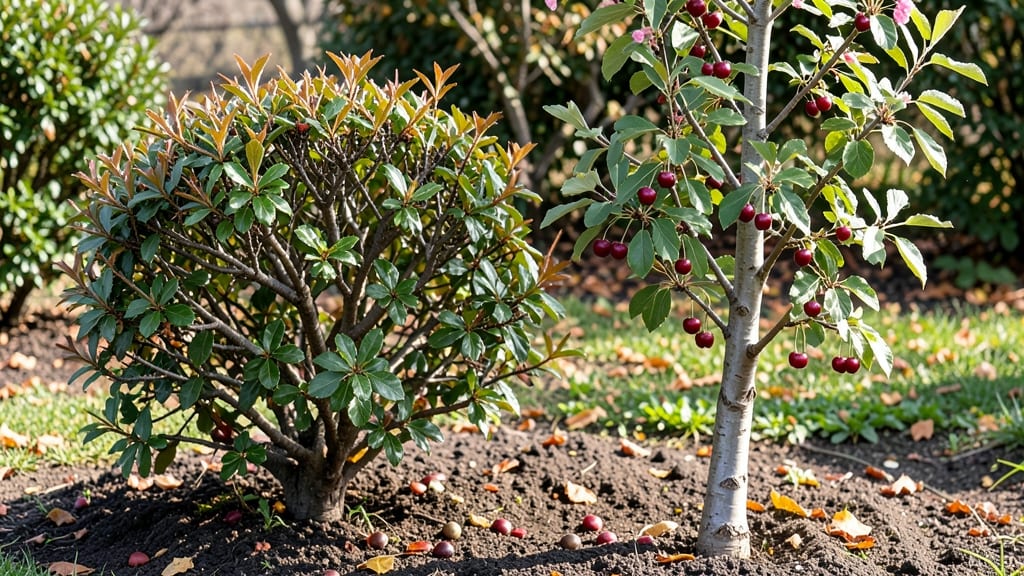
Shrub fruit trees deliver year-round interest—spring blooms, summer fruit, and fall color—when you master the layered chill method for reliable production. 🌿 I’ve watched these compact trees transform bare winter branches into fragrant blossoms and eventually heavy harvests, proving that dwarf fruit trees aren’t just for ornamental value.
The key lies in understanding their chill hour requirements and how to meet them naturally, even in warmer climates.
These trees thrive in partial sun to full sun with well-draining soil, making them perfect for small yards, urban gardens, or even large containers. Varieties like apricot, peach, and plum shrubs are particularly adaptable, offering fruit in as little as 2-3 years once established.
The layered chill method involves selecting cold-hardy varieties and supplementing natural winter chilling with strategic pruning and microclimate adjustments—no artificial chilling chambers needed.
By late spring, you’ll see vibrant pink or white blossoms followed by sweet, sun-ripened fruit that’s easier to pick than from traditional trees. The real magic happens when you prune correctly in late winter to encourage strong growth and better fruit set.
With proper care, these shrubs produce consistently for decades, offering both beauty and bounty with minimal space.
Whether you’re in Zone 5 or Zone 8, the layered chill approach ensures reliable blooming and fruiting. I’ll walk you through variety selection, planting techniques, and seasonal maintenance so you can enjoy these versatile trees without the fuss of full-sized fruit trees.
Let’s get started with the foundational steps that set you up for success.
📚 In This Guide
- What you need
- Instructions
- Tips and common mistakes
- Wrapping up and next steps
What you need
- ● Shrub fruit tree saplings: Choose cold-hardy varieties like arctic kiwi, hardy figs, or juneberries. Buy 3–5 plants (or more for pollination if needed).
- ● Well-draining potting mix: 10–15 gallons (sterile, organic blend with perlite or vermiculite).
- ● Large containers: 5–7 gallon pots (with drainage holes) or 1–2 ft deep nursery beds if planting outdoors.
- ● Cold stratification setup: Refrigerator or cold room (set to 34–40°F for 4–8 weeks).
- ● Moistened paper towels or peat moss (to wrap roots/seeds).
- ○ Rooting hormone (optional but helpful for faster growth).
- ● Pruning shears (sterilized with rubbing alcohol).
- ● Trowel or small shovel (for transplanting).
- ● pH testing kit (ideal soil pH: 5.5–7.0).
- ● Misting bottle (to keep roots moist during stratification).
- ● Thermometer (to monitor cold temps).
- ● Grow lights or sunny windowsill (for indoor stratification).
- ● Location: A cool, dark spot for stratification (basement, garage, or fridge).
- ● Time commitment: 4–12 weeks of chill time + ongoing care post-transplant.
- ● Patience: Shrub fruit trees may take 1–3 years to bear fruit!
- ○ Optional extras: Slow-release fertilizer (balanced NPK, 10-10-10).
- ● Mulch (straw or wood chips to retain moisture).
- ● Drip irrigation system (for larger plantings).
Step-by-Step instructions for layering shrub fruit trees
This method ensures your shrub fruit trees get the winter chill they need for abundant spring blooms.
🌱 Step 1: Select and Prepare Healthy Branches
Choose branches that are 1/4 to 1/2 inch thick and pencil-sized for best results. I look for ones that are flexible but not brittle—these bend easily without snapping. Make a clean cut at a 45-degree angle just above a leaf node or bud, using sharp pruning shears. This angle helps water run off and prevents rot.
Strip off all leaves from the lower 6-8 inches of the branch. Removing leaves reduces stress on the plant and focuses energy on root development. Keep the top leaves to continue photosynthesis. Store the prepared branches in a cool, dark place until you're ready to layer them.
💧 Step 2: Create the Layering Trench
Dig a trench about 3-4 inches deep along the drip line of the shrub fruit tree. The trench should be 12-18 inches long, depending on how many branches you're layering. Keep the trench moist but not soggy—water it lightly before placing the branches inside.
I like to add a handful of sand or perlite to the bottom of the trench to improve drainage. This prevents waterlogging, which can cause the branch to rot before roots form. Gently loosen the soil at the bottom of the trench to encourage root growth when you bury the branch later.
✂️ Step 3: Bury and Secure the Branches
Place the prepared branch into the trench, bending it gently to reach the ground. Make sure the cut end is still above the soil level—you'll bury the middle section, not the tip. Cover the middle 6-8 inches of the branch with soil, leaving the top exposed and the cut end uncovered.
Secure the branch in place with a small U-shaped wire or a bent piece of rebar. This keeps the branch stable while roots develop. I like to mound extra soil around the secured section to hold it firmly. Keep the soil moist but not waterlogged for the next 4-6 weeks.
☀️ Step 4: Monitor and Encourage Root Growth
Check the buried section regularly for signs of new growth. You'll know roots are forming when you see small bumps or shoots emerging from the soil. Keep the area consistently moist—water when the top inch of soil feels dry to the touch. Avoid overwatering, which can suffocate new roots.
Once you see new shoots or roots, it's time to separate the layered branch from the parent plant. Use clean pruning shears to cut it free, leaving about 1-2 inches of stem below the new roots. Transplant the new plant to its permanent location, ensuring it gets the same growing conditions as the parent shrub.
🌿 Step 5: Transition to Independent Growth
After transplanting, water the new shrub fruit tree deeply to help it establish in its new home. Mulch around the base with 2-3 inches of organic mulch to retain moisture and regulate soil temperature. Keep the soil consistently moist for the first 2-3 weeks to reduce transplant shock.
Give the new plant time to adjust—it may take a few weeks for it to fully recover and start growing vigorously. You'll see strong new growth as a sign that it's thriving. This method ensures your shrub fruit trees get the layered chill they need for reliable spring blooms and fruit production.
Tips & tricks for perfectly layered shrub fruit trees
These proven techniques will help you maximize success with your layered shrub fruit trees—avoiding the most common pitfalls while ensuring robust root development.
Branch Selection Wisdom: In Step 1, prioritize branches with a slight curve rather than perfectly straight ones—they handle bending better during layering. I've found that branches with a slight bend already are less likely to snap when you're positioning them in the trench. Also, avoid branches with any signs of disease or insect damage, no matter how tempting they might seem. Healthy branches are your foundation for success.
Trench Preparation Technique: When creating your 3-4 inch deep trench in Step 2, consider adding a thin layer of horticultural sand or perlite at the very bottom—not just mixed in. This creates a drainage layer that prevents water from pooling directly against the buried branch, which is critical for preventing rot. Think of it as creating a mini root-friendly environment right where your new roots will form.
Moisture Management Strategy: In Step 3, maintaining consistent moisture for those critical 4-6 weeks is where most gardeners struggle. I recommend installing a simple drip irrigation line along the trench before burying the branches—this ensures even moisture without the risk of overwatering. If you don't have drip irrigation, use a spray bottle to mist the soil daily during dry periods, keeping it damp but never soggy.
Root Development Visual Cues: During Step 4's monitoring phase, look for three key signs of successful root formation: tiny white root hairs emerging from the buried section, slight swelling along the stem where roots are developing, and new leaf growth at the tip of the branch. These visual cues confirm your layering is working—don't wait for dramatic changes, as roots often form before you see obvious above-ground growth.
Pro Tips for Shrub Fruit Trees
- These proven techniques will help you maximize success with your layered shrub fruit trees—avoiding the most common pitfalls while ensuring robust root development.
- Branch Selection Wisdom: In Step 1, prioritize branches with a slight curve rather than perfectly straight ones—they handle bending better during layering.
- Trench Preparation Technique: When creating your 3-4 inch deep trench in Step 2, consider adding a thin layer of horticultural sand or perlite at the very bottom—not just mixed in.
Frequently asked questions
Got questions about growing shrub fruit trees with the layered chill method? You’re not alone!
Here are answers to the most common concerns—plus a few pro tips to set you up for success.
What’s the best way to mimic winter chill for shrub fruit trees indoors?
Use a layered chill method by placing potted trees in a cool (35–45°F), dark space (like a garage or basement) for 6–8 weeks. For extra realism, add a fan for airflow and mist lightly to simulate winter moisture. Avoid heat sources—consistency is key!
How do I know if my shrub fruit tree has gotten enough chill hours?
Most shrub fruit trees need 200–800 chill hours (below 45°F). Track with a chill hour counter or a simple thermometer log. If buds aren’t swelling after 8 weeks, extend the chill period or check your tree’s specific variety requirements—some need more!
Can I grow dwarf shrub fruit trees in containers year-round?
Yes! Dwarf varieties (like columnar apple or patio peach) thrive in containers, but they must get their chill hours. Move pots outdoors in fall/winter if temps drop naturally, or use a refrigerator hack (unplugged, dark, and humid). Just ensure drainage—root rot is a container grower’s worst enemy!
Why aren’t my shrub fruit tree buds opening after the chill period?
Bud dormancy issues often stem from inconsistent temps, poor drainage, or lack of light post-chill. After the cold phase, place trees in bright indirect light (6+ hours/day) and keep soil slightly moist. If buds still refuse, check for pests (like scale) or nutrient deficiencies (use a balanced fertilizer).
Are there low-chill shrub fruit tree alternatives for warm climates?
Opt for low-chill varieties like:
- Fig trees (0–300 chill hours)
- Pomegranate (150–300 chill hours)
- Loquat (200–400 chill hours)
- Dwarf citrus (0–150 chill hours)
Wrapping up and next steps
Growing shrub fruit trees with the layered chill method is your ticket to reliable, vibrant blooms every spring—no more guessing games with finicky varieties! 🌸 Whether you’re a seasoned gardener or just starting, this technique unlocks the potential of cold-hardy favorites like apricots, plums, and cherries, ensuring bountiful harvests year after year.
The key? Patience, precision, and a little extra care during those critical winter months.
Ready to transform your garden? Start by gathering your supplies and reviewing the FAQs—then roll up your sleeves and give it a try! 🌱 Even small steps, like monitoring chill hours or adjusting moisture levels, can make a world of difference.
Happy growing, and here’s to next year’s sweetest surprises!