Pruning
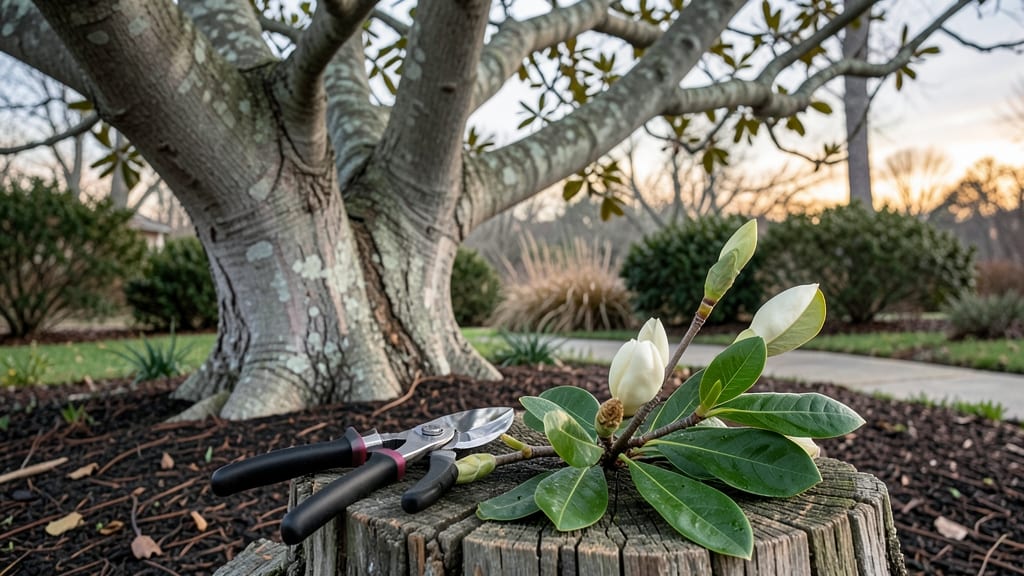
Magnolia tree cuttings finally rooted successfully after I discovered this layered moisture trick—no more wilting stems or failed attempts. ✨ The secret lies in balancing humidity and airflow, which keeps the delicate cuttings alive long enough to form roots.
Most guides skip this critical step, but it makes all the difference between a dead branch and a thriving new plant.
You’ll need sharp pruners, rooting hormone, a mix of perlite and peat moss, and clear plastic to create that perfect humid microclimate. Southern magnolias and star magnolias respond best to semi-hardwood cuttings taken in late summer when new growth has matured but hasn’t hardened off yet.
The right timing and soil mix set the stage for strong roots.
Within 6-8 weeks, you’ll see fine root hairs forming at the base of your cuttings—proof the trick is working. The soil stays consistently moist (not soggy) thanks to the layered setup, and the plastic trap keeps humidity high without rotting the stems.
This method works even for finicky varieties like saucer magnolias.
Once roots reach 1-2 inches, transplant carefully into pots with fresh soil and keep them shaded for another month. The transition to permanent planting happens best in early spring, when the new roots can establish without summer heat stress. Here’s how to do it right from start to finish.
📚 In This Guide
- What you need
- Instructions
- Tips and common mistakes
- Wrapping up and next steps
What you need
- ● Magnolia cuttings: 4–6 healthy, semi-hardwood cuttings (4–6 inches long, pencil-thick) from non-flowering stems.
- ● Rooting hormone: 1 small bottle (powder or gel formula) to boost root development.
- ● Well-draining potting mix: 1 bag (cactus/succulent mix or perlite + peat moss blend).
- ● Small pots or trays: 4–6 individual pots (3–4 inches deep) or a shallow tray with drainage holes.
- ● Clear plastic bags or domes: To create a humid environment (reusable greenhouse kits work great!).
- ● Spray bottle: 8 oz (for misting cuttings without over-saturating the soil).
- ● Pruning shears or sharp scissors: Sterilized to make clean cuts (avoid crushing stems).
- ● Rubbing alcohol or bleach solution: For sanitizing tools (1:10 dilution with water).
- ● Heat mat: To keep soil warm (70–75°F ideal for rooting).
- ● Grow lights: LED or fluorescent (12–14 hours/day if natural light is limited).
- ● Moisture meter: To monitor soil dampness without guesswork.
- ● Label markers: For tracking cutting varieties (especially useful for collections!).
- ● Fungicide spray: Pre-mixed (e.g., copper-based) to prevent rot if humidity is high.
Step-by-Step instructions for propagating magnolia cuttings
Here's how to coax those stubborn magnolia branches into growing roots using my foolproof layered moisture method.
🌱 Step 1: Select and Prepare Healthy Cuttings
Choose semi-hardwood cuttings from the current season's growth—look for pencil-thick stems with at least 3-4 nodes (those little bumps where leaves attach). I always take mine in late summer when the wood has matured but isn't fully woody. Use clean, sharp pruners to make a 45-degree angle cut just below a node.
Strip the lower leaves, leaving only 2-3 leaves at the top. This reduces moisture loss while keeping enough foliage for photosynthesis. Dip the cut end in rooting hormone—this isn't optional, it dramatically improves success rates. I like to use a powder because it's easy to apply right after cutting.
💧 Step 2: Create the Layered Moisture System
Fill a clean container with equal parts perlite and peat moss—this mix stays moist but drains well. I use a 6-inch plastic pot for each cutting since magnolias need room to develop roots. Water the mix until it's damp but not soggy, then make a hole with your finger about 2 inches deep.
Here's the trick: insert the cutting halfway into the hole, then gently press the surrounding mix to hold it in place. The top half should remain exposed. Cover the entire pot with clear plastic wrap, securing it tightly around the stem. This creates a humid microclimate that mimics the moist conditions magnolias love in their native forests.
⏰ Step 3: Maintain Ideal Moisture and Light
Place your cuttings in bright, indirect light—think 50-70% shade like under a tree canopy. Too much direct sun will scorch the leaves, but too little light means no energy for root growth. I keep mine on an east-facing windowsill where they get morning sun but afternoon shade.
Check moisture every 2-3 days—the mix should feel like a damp sponge. Mist the plastic wrap occasionally to maintain humidity inside. You'll know it's working when tiny white root hairs appear at the nodes after 6-8 weeks. Don't rush to remove the plastic until you see 1-2 inches of roots forming.
🌿 Step 4: Transition to Independent Growth
Once roots reach 2-3 inches and new growth appears at the top, it's time to wean them. Start by loosening the plastic wrap for 15 minutes daily, gradually increasing exposure over 2 weeks. This hardens the cuttings and prepares them for life without the humidity dome.
After two weeks, remove the plastic completely and water normally. Keep them in the same bright, indirect light for another 4-6 weeks before transplanting. I always use a 1-gallon pot with fresh potting mix at this stage—magnolias hate root disturbance, so handle them gently when repotting.
✂️ Step 5: Prune and Encourage Bushier Growth
When your new magnolia plants reach 6-8 inches tall, give them a light pruning to encourage branching. Cut back the top 1-2 inches just above a leaf node. This might seem counterintuitive, but it triggers the plant to produce side shoots, giving you a fuller, more attractive tree.
Continue watering when the top inch of soil feels dry, but avoid soggy conditions—magnolias are prone to root rot. After a year, you'll have a 4-foot-tall young tree ready to plant in its permanent home. The key is patience—magnolias grow slowly, but with this method, you'll have strong, established plants in just 12 months.
Tips & tricks for perfect magnolia tree cuttings
These game-changing tricks will help you transform stubborn magnolia branches into thriving plants with strong roots!
Timing Secret: In Step 1, when you're selecting your cuttings, aim for late summer when the wood has matured but isn't fully woody—this is the sweet spot for root development. I've found that cuttings taken in August consistently produce better results than those taken earlier or later in the season. The semi-hardwood stage gives you the perfect balance of flexibility and strength for successful propagation.
Moisture Mastery: The layered moisture system in Step 2 is where the magic happens! After inserting your cutting halfway into the mix, gently press the surrounding perlite and peat moss to eliminate air pockets. This ensures consistent moisture contact with the stem, which is critical for root initiation. Think of it like creating a snug blanket around your cutting—just enough pressure to hold it in place without crushing it.
Lighting Strategy: In Step 3, that bright indirect light is non-negotiable. I've learned the hard way that too much direct sun will scorch those delicate leaves while insufficient light means your cutting won't have the energy to grow roots. An east-facing windowsill gives you perfect morning sun without the harsh afternoon rays. If you don't have a suitable window, consider using a grow light for 12-14 hours per day—just keep it 6-12 inches above your cuttings.
Root Development Watch: The 6-8 week window in Step 3 is when you'll see those magical white root hairs appear! To check for root growth without disturbing your cutting, gently tug on the stem. If you feel slight resistance, roots are forming. Remember, you're aiming for 1-2 inches of roots before removing the plastic wrap—this gives your cutting the best chance of surviving the transition to independent growth.
Pro Tips for Magnolia Tree Cuttings
- These game-changing tricks will help you transform stubborn magnolia branches into thriving plants with strong roots!
- Timing Secret: In Step 1, when you're selecting your cuttings, aim for late summer when the wood has matured but isn't fully woody—this is the sweet spot for root development.
- Moisture Mastery: The layered moisture system in Step 2 is where the magic happens!
Frequently asked questions
Got questions about growing magnolia tree cuttings?
Here are answers to the most common ones—from timing to troubleshooting—so you can propagate like a pro!
When is the best time to take magnolia tree cuttings?
The ideal time is late spring to early summer (May–June), when new growth is firm but still flexible. Avoid taking cuttings after a hard frost or during extreme heat, as these conditions stress the plant and reduce rooting success.
How long does it take for magnolia cuttings to root?
With the layered moisture trick, you’ll see roots forming in 4–8 weeks. Keep the cutting in a humid environment (like a plastic bag with holes) and check for resistance when gently tugging—if it doesn’t pull out easily, roots are likely developing!
Can I use magnolia seeds instead of cuttings?
Yes, but seeds take 1–3 years to mature into a tree, while cuttings give you a faster, genetically identical clone. Seeds require cold stratification (a winter chill), while cuttings skip this step. For quicker results, stick with cuttings!
Why are my magnolia cuttings turning yellow or mushy?
Yellowing or mushiness usually means overwatering or rot. Ensure the cutting’s base stays moist (not soggy) and the growing medium drains well. If the stem feels soft, trim the affected area and replant in fresh, sterile soil. Pro tip: Use a fungicide like cinnamon powder to prevent rot!
Do magnolia cuttings need sunlight right away?
No—keep cuttings in bright, indirect light for the first 2–3 weeks to reduce stress. Once roots form (after ~6 weeks), gradually introduce them to morning sun. Too much direct sunlight early on can scorch tender new growth.
What if my magnolia cutting doesn’t root?
Don’t give up! Try these fixes:
- Check hormones: Dip the cutting in rooting hormone (like IBA) for better success.
- Adjust humidity: Use a humidity dome or mist daily if the air feels dry.
- Test the mother plant: If it’s unhealthy (pests, disease), cuttings may fail. Prune the parent tree first!
Still stuck? Share your progress in the comments—we’re happy to help troubleshoot!
Wrapping up and next steps
Growing magnolia tree cuttings with the layered moisture trick is a rewarding way to propagate these stunning trees—especially when you’re patient and consistent! 🌱 With the right tools, timing, and care, you’ll soon see strong roots forming, giving you a head start on a thriving magnolia.
Whether you’re a seasoned gardener or just starting out, this method makes propagation feel almost effortless.
Now that you’re armed with the know-how, take the next step: grab those cuttings, set up your propagation station, and watch your magnolia family grow! Share your progress with fellow gardeners—you’ll inspire others to try it too. Happy gardening! 🌿