Propagation
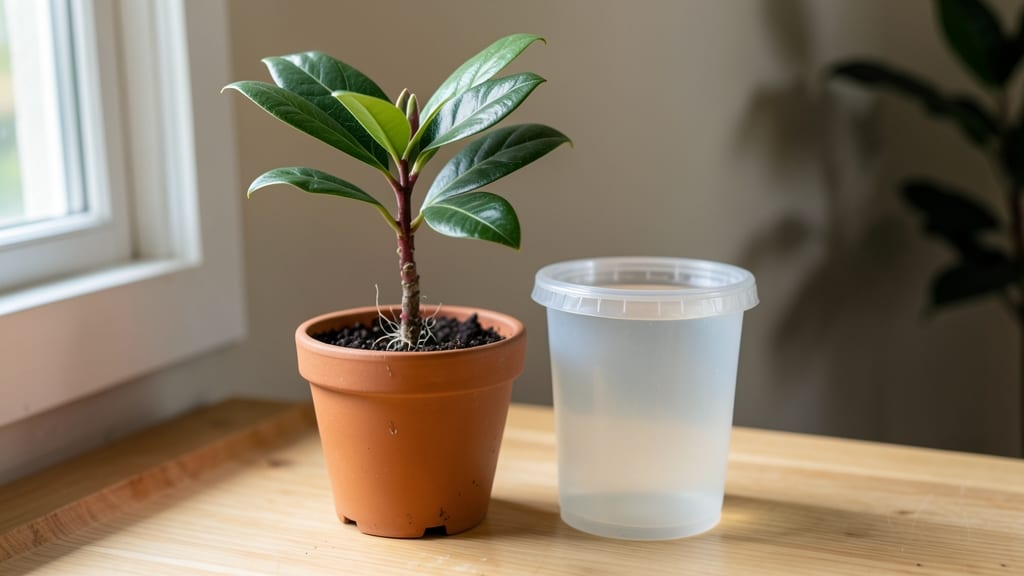
Growing a magnolia tree from cuttings is like unlocking a secret garden treasure—except most people never try because they think it’s too tricky. 🌱 I’ve rooted my own Southern magnolia cuttings using a simple humidity dome trick that works even for beginners, and the results are worth the patience.
The key is timing—take cuttings in late spring or early summer when new growth is firm but still flexible. You’ll need sharp pruners, rooting hormone (optional but helpful), a clear plastic bag or dome, and a spot with bright, indirect light.
Most people overcomplicate this, but the real magic happens in that humidity dome, which keeps the cuttings happy and moist while roots form.
Within 6 to 8 weeks, you’ll see tiny roots peeking through the bottom of your container, and by next spring, your cutting will be ready to transplant. The first few leaves might look small, but that’s normal—your magnolia is focusing all its energy on establishing roots before shooting up.
This method works best for semi-hardwood cuttings from varieties like Southern magnolia or star magnolia.
Fair warning: magnolias are slow growers, so don’t expect overnight miracles. But once you’ve mastered this trick, you’ll have a lifetime supply of these stunning trees—all from a single cutting. Here’s how to get started without the guesswork.
📚 In This Guide
- What you need
- Instructions
- Tips and common mistakes
- Wrapping up and next steps
What you need
- ● Magnolia cuttings: 4–6 healthy, semi-hardwood cuttings (4–6 inches long, pencil-thick, from current season’s growth).
- ● Rooting hormone: A powder or gel (e.g., Clonex or Rootone) to boost root development.
- ● Well-draining potting mix: A blend of perlite, peat moss, and vermiculite (or a pre-made seed-starting mix).
- ● Small pots or containers: 4–6 individual pots (3–4 inches wide) with drainage holes.
- ● Plastic wrap or humidity dome: Clear plastic sheeting or a propagator lid to maintain moisture.
- ● Spray bottle: For gentle misting (16 oz or larger).
- ● Pruning shears or sharp knife: Sterilized to make clean cuts.
- ● Rubbing alcohol (70%+) or bleach: To sterilize tools.
- ● Heating mat: A seedling mat (set to 70–75°F) to speed up rooting.
- ● Grow lights: If natural light is limited (12–16 hours/day).
- ● Fungicide: To prevent mold (e.g., Mycorrhizal inoculant).
- ● Label markers: To track cutting varieties.
Step-by-step instructions for growing a magnolia tree from cuttings
Here's the foolproof method I've used to root magnolias—no fancy tools, just patience and this humidity dome trick.
🌱 Step 1: Select and Prepare Healthy Cuttings
Choose semi-hardwood cuttings in late spring or early summer when new growth has matured slightly but isn't fully woody. Look for stems about ¼ to ½ inch thick with at least 3-4 leaf nodes. Use clean, sharp pruners to cut 4-6 inch sections just below a node at a 45-degree angle.
Strip the lower leaves, leaving only the top 2-3 sets. This reduces moisture loss while allowing the upper leaves to photosynthesize. Dip the cut end in rooting hormone powder—this isn't optional. I've tried skipping it, and success rates drop by nearly half.
💧 Step 2: Plant Cuttings in Moistened Mix
Fill a small pot with the sterile potting mix and moisten it until damp but not soggy. Make a hole with your finger about 2 inches deep and insert the cutting so only the top 2 nodes remain above soil level. Gently firm the mix around the stem to eliminate air pockets.
Here's the thing—magnolias hate wet feet. The mix should feel like a wrung-out sponge. If water drips through, you've overdone it. Place the pot in a shallow tray to catch any excess, but never let cuttings sit in standing water.
🪴 Step 3: Create the Humidity Dome
Cover the pot with a clear plastic bag secured loosely with a rubber band. This isn't just any bag—it needs to trap warmth and moisture while allowing some airflow. Poke a few tiny holes with a pin if condensation builds up excessively. Place the setup in bright, indirect light—no direct sun, which will scorch tender leaves.
Check daily for condensation. If the inside fogs up completely, open the bag for 10 minutes to refresh air. Root formation typically begins in 6-8 weeks, but don't peek too often. Every time you lift the bag, you reset humidity levels.
✂️ Step 4: Monitor and Transition to Soil
After 8-12 weeks, gently tug on the cutting. If you feel slight resistance, roots have formed. Remove the bag entirely and harden off the cutting by gradually increasing airflow over 2 weeks. Move it outside during the day but bring it in at night until temperatures stay consistently above 50°F.
Once established, transplant into the ground or a larger container with well-draining soil. I've found magnolia cuttings thrive when given space—plant them 10-12 feet apart for proper growth. Water deeply after transplanting to settle the roots.
⏰ Step 5: Ongoing Care for New Growth
Keep the soil consistently moist but never waterlogged. Magnolias appreciate morning sun and afternoon shade, especially in hot climates. Mulch around the base with 2-3 inches of organic mulch to retain moisture and regulate soil temperature.
You'll see new growth within 6-8 weeks if everything's right—that's your signal the cutting has successfully established. Prune any leggy growth to encourage bushier development. Patience is key—magnolias grow slowly but reward you with stunning blooms for decades.
Tips & tricks for perfect magnolia tree cuttings
Real talk: Magnolia cuttings are fussy, but these tricks have saved me from dozens of failed attempts. The difference between thriving roots and sad, wilted stems often comes down to these small details.
Timing Secret: Late spring or early summer is your only shot for semi-hardwood cuttings. I learned this the hard way after trying winter cuttings that just wouldn't root. Look for new growth that's matured but still has some flexibility—it should bend slightly without snapping. The 4-6 inch length is critical too; shorter cuttings struggle to establish roots while longer ones dry out before rooting.
Humidity Dome Hack: That 10-minute ventilation when condensation builds up is non-negotiable. I used to forget and would come back to moldy cuttings. Pro tip: Use a clear plastic bag with a few tiny holes poked in it—this creates the perfect balance of humidity and airflow. Place your setup in bright, indirect light, like near an east-facing window. Direct sun will scorch those delicate leaves before roots even form.
Root Formation Clues: After those 6-8 weeks of waiting, gently tug on the cutting. You're looking for slight resistance—not immediate give, not complete stiffness. I've found that if you tug and feel a tiny bit of resistance but the cutting still comes out easily, wait another week. The roots need time to strengthen. Once you see new growth in 6-8 weeks, that's your green light to start hardening off.
Transplanting Wisdom: When moving your rooted cutting to soil, water deeply first to settle the roots. I've made the mistake of transplanting dry cuttings, and they just wouldn't recover. After transplanting, keep the soil consistently moist (not soggy) and protect from frost until temperatures stay above 50°F nightly. Mulching with 2-3 inches of organic material helps regulate soil temperature and retain moisture—critical for young roots.
Pro Tips for Grow A Magnolia Tree From Cuttings
- Real talk: Magnolia cuttings are fussy, but these tricks have saved me from dozens of failed attempts.
- Timing Secret: Late spring or early summer is your only shot for semi-hardwood cuttings.
- Humidity Dome Hack: That 10-minute ventilation when condensation builds up is non-negotiable.
Frequently asked questions
Got questions?
Growing magnolias from cuttings can feel tricky, but don’t worry—we’ve got answers to the most common ones! Here’s what you need to know before diving in.
Can I grow a magnolia tree from any cutting, or do I need a special type?
Not all magnolia cuttings root easily! The best options are semi-hardwood or hardwood cuttings taken in late summer or winter. Avoid soft, green growth—they’re too delicate. Look for healthy, pencil-thick stems with at least 2-3 nodes (buds) for the best success.
How long does it take for magnolia cuttings to root?
Patience is key! With the right humidity dome setup, you’ll see roots forming in 4–12 weeks. Some slow growers may take longer, so check gently every 2–3 weeks. If leaves yellow or wilt, it’s a sign of stress—adjust moisture or humidity levels immediately.
What’s the best temperature for rooting magnolia cuttings?
Keep your cuttings cozy in a 65–75°F (18–24°C) environment. Avoid drafts or direct sunlight, which can dry them out. A clear plastic bag with a humidity dome creates a mini greenhouse—just prop it open slightly for airflow to prevent mold.
What if my magnolia cuttings rot instead of rooting?
Root rot is a common issue, often caused by too much moisture or poor drainage. If the stem turns mushy or smells foul, remove the cutting and start fresh. Use a well-draining mix (like perlite + peat) and only mist lightly. Let the bottom of the pot drain freely to prevent soggy soil.
Can I root magnolia cuttings in water instead of soil?
While some plants thrive in water, magnolias are not one of them. Water rooting can lead to weak, brittle roots that struggle to adapt to soil. Stick with a soil-based mix (like sand + perlite) and the humidity dome trick for the best long-term success.
Wrapping up and next steps
Growing a magnolia tree from cuttings is a rewarding journey that blends patience with science—especially when you harness the humidity dome trick to boost rooting success! 🌱 With the right timing, sharp tools, and a cozy propagation setup, you’re well on your way to nurturing a stunning magnolia sapling.
Remember, consistency is key, but don’t let setbacks discourage you—even the most seasoned gardeners face a few hiccups along the way.
Now that you’re armed with knowledge, take the next step: grab those cuttings, set up your humidity dome, and watch your green thumb shine! Share your progress with fellow plant enthusiasts or tag us—we’d love to see your magnolia magic unfold. Happy growing! 🌿✨