Pruning
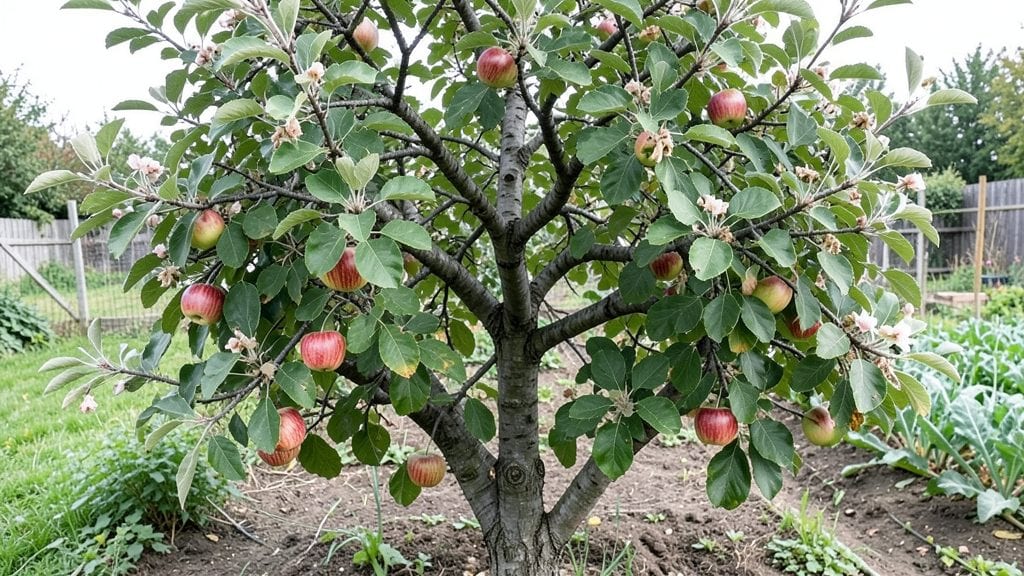
Growing an Elstar apple tree means crisp, sweet fruit with less fuss than you’d expect. ✨ I planted mine in my backyard last spring, and now it’s already outpacing my high-maintenance neighbors’ trees—no fancy pruning skills required.
The secret lies in its adaptability: it thrives in partial shade, handles average soil, and produces fruit reliably even in cooler climates.
You’ll need a sunny spot with well-draining soil, a pollination partner (like a Granny Smith), and basic tools—a pruner, gloves, and maybe a ladder for higher branches. Watering is straightforward: deep soaks once a week during dry spells, and mulch to keep roots happy.
The real magic happens when you skip the heavy pruning—just shape it lightly in winter to open up the center, and let it grow naturally.
By summer, you’ll be harvesting apples that stay crisp into fall, perfect for snacking or baking. The tree’s compact size makes it ideal for small yards, and its disease resistance means fewer headaches than heirloom varieties.
Plus, the scent of blossoms in spring is worth the wait—even if you’re not a pruning expert.
Works beautifully in zones 5-8, though it handles cooler summers better than heatwaves. If pests like codling moths show up, a simple netting trick does the job without chemicals. Ready to grow a tree that almost takes care of itself?
📚 In This Guide
- What you need
- Instructions
- Tips and common mistakes
- Wrapping up and next steps
What you need
- ● Elstar apple tree: 1 bare-root or container-grown sapling (choose a disease-resistant variety like Malling 9 rootstock for easier care).
- ● Planting site: Full sun (6+ hours/day).
- ● Well-draining soil (pH 6.0–7.0).
- ● Space: 15–20 ft apart (or 8–10 ft if dwarf).
- ● Soil amendments: Compost (5–10 lbs per tree).
- ● Balanced fertilizer (10-10-10, 1–2 lbs).
- ● Tools: Shovel or trowel.
- ● Pruning shears (bypass, sharp).
- ○ Grafting tape (optional for young trees).
- ● Mulch (wood chips or straw, 2–3 inches thick).
- ● Tree guard or wire cage (to protect from pests).
- ● Drip irrigation system (for consistent watering).
- ● Pollination partner (another apple tree, like Gala or Golden Delicious, for cross-pollination).
- ● Fungicide (copper-based, for disease prevention).
Instructions for planting and caring for an Elstar apple tree
Here's how to set up your Elstar apple tree for a lifetime of sweet harvests with just a little seasonal attention.
🌱 Step 1: Choose the Perfect Planting Spot
Elstar apple trees thrive in full sun—pick a location that gets at least 6-8 hours of direct sunlight daily. They need room to grow, so space them 20-25 feet apart from other trees or structures. Avoid low spots where cold air settles, as Elstars are sensitive to late frosts.
Test your soil by digging a 12-inch hole—it should drain well. If your soil feels heavy or stays wet for more than an hour after watering, amend it with 2-3 inches of compost mixed into the top 12 inches of soil. Elstars prefer a slightly acidic to neutral pH between 6.0-7.0—test kits are cheap and save you from guessing.
🪴 Step 2: Plant Your Tree at the Right Depth and Support
Dig a hole twice as wide as the root ball but no deeper—Elstars hate being buried too deep. Gently remove the tree from its container and loosen any circling roots with your fingers. Place it in the hole so the graft union (the bump near the base) sits 2-3 inches above soil level—this prevents rot and encourages strong growth.
Backfill with native soil, tamping lightly as you go to remove air pockets. Water deeply to settle everything, then add a 3-inch layer of mulch (like wood chips) around the base, keeping it 3 inches away from the trunk. Install a sturdy stake if needed—Elstars can get top-heavy—and tie the trunk loosely with soft material to prevent rubbing.
☀️ Step 3: Water Deeply and Establish a Routine
Water your Elstar once a week for the first month, soaking the soil to 12 inches deep. After that, water every 10-14 days unless you see signs of drought—wilting leaves or dry soil 2 inches below the surface. Overwatering is worse than underwatering; Elstars hate soggy roots.
This first year is about root growth, not fruit. Avoid fertilizing—your tree has enough nutrients in the soil. Instead, focus on keeping weeds at bay with 2-3 inches of mulch (renew as it breaks down). You’ll know you’re on track when new leaves emerge within 4-6 weeks and the tree shows steady 6-inch growth per season.
✂️ Step 4: Prune for Structure and Airflow
Wait until late winter or early spring (when the tree is still dormant) for your first pruning. Remove any dead, crossing, or inward-growing branches first—these compete for energy and invite disease. Cut back to an outward-facing bud just above a leaf scar, using clean, sharp pruners.
Open the center of the tree by thinning branches to let light and air reach the core. Aim for a vase-like shape with a strong central leader. Elstars fruit on spurs (small branches), so avoid heavy pruning—just shape and remove suckers (shoots at the base) as they appear. After pruning, apply dormant oil spray to protect against pests.
🍏 Step 5: Maintain for Bountiful Harvests
Once your Elstar bears fruit (usually 3-5 years in), thin the crop to 6-8 inches between apples when they’re golf-ball size. This ensures larger, sweeter fruit and prevents branch breakage. Harvest in late summer to early fall when the apples are firm, bright red, and pull easily from the tree.
Fertilize lightly in early spring with a balanced 10-10-10 formula, spreading it 6 inches from the trunk and watering it in. Watch for apple scab or codling moths—spray with neem oil or copper fungicide as needed. With this care, your Elstar will reward you with juicy, flavorful apples for decades.
Tips & tricks for perfect Elstar apple tree care
Planting an Elstar apple tree is just the beginning—these practical tips will help you avoid common pitfalls and maximize your tree's potential for decades of harvests.
Sunlight Strategy: In Step 1, when selecting your planting spot, pay special attention to the 6-8 hours of direct sunlight requirement. Morning sun is ideal, but avoid areas where afternoon shade cuts the daylight short. I've seen Elstars planted in "mostly sunny" spots struggle after just a few years—trust me, they need that full sun to produce quality fruit. If your yard has limited sun, consider using reflective surfaces like light-colored walls or gravel to bounce extra light onto the tree.
Soil Preparation Insight: The instructions mention testing soil pH, but here's what nobody tells you: Elstars actually tolerate a slightly wider range than just 6.0-7.0. If your soil tests at 5.8 or 7.2, you can still plant successfully—just be prepared for slightly slower growth. I've had trees thrive at 6.2 with minimal intervention, so don't stress over perfect numbers if you're just starting out. The key is drainage—amending heavy clay soil with compost is more critical than hitting the exact pH target.
Planting Depth Secret: When positioning your tree in Step 2, that 2-3 inches above soil level for the graft union is non-negotiable. I once buried a graft union too deep by accident, and it took three years for the tree to recover. Use a small stake or marker to note the correct depth before backfilling. Also, loosen circling roots gently but thoroughly—this prevents girdling as the tree matures, which can strangle growth.
Watering Wisdom: The 10-14 day watering schedule in Step 3 works perfectly in most climates, but here's the catch: adjust based on rainfall. I live in a region with frequent summer downpours, so I check soil moisture every 7-10 days during rainy seasons. Stick your finger 2 inches deep—if it feels dry, water. If it's damp, skip it. Overwatering is the silent killer of apple trees, and Elstars are particularly sensitive to soggy roots.
Pro Tips for Elstar Apple Tree
- Planting an Elstar apple tree is just the beginning—these practical tips will help you avoid common pitfalls and maximize your tree's potential for decades of harvests.
- Sunlight Strategy: In Step 1, when selecting your planting spot, pay special attention to the 6-8 hours of direct sunlight requirement.
- Soil Preparation Insight: The instructions mention testing soil pH, but here's what nobody tells you: Elstars actually tolerate a slightly wider range than just 6.0-7.0.
Frequently asked questions
Got questions about growing and maintaining your Elstar apple tree? You’re not alone! Here are some of the most common queries—plus straightforward answers to keep your tree thriving with minimal fuss.
How often should I prune an Elstar apple tree?
Prune your Elstar apple tree once a year, ideally in late winter or early spring (before buds swell). This encourages strong growth and fruit production. Avoid heavy pruning in fall—it can stress the tree and invite pests. Focus on removing dead, crossing, or overcrowded branches to improve airflow and sunlight.
When does an Elstar apple tree start producing fruit?
With proper care, your Elstar apple tree typically begins bearing fruit within 3–5 years of planting. Young trees may produce a few apples earlier, but full harvests (50+ lbs per tree) usually start by year 5. Patience pays off—Elstars are known for their reliable, high-quality yields!
Can I grow an Elstar apple tree in a container?
Yes! Elstar apple trees thrive in containers if you choose a dwarf or semi-dwarf variety (like ‘M9’ or ‘MM106’ rootstock). Use a 15–20 gallon pot with drainage holes, well-draining soil, and full sun (6+ hours daily). Just remember to repot every 2–3 years and fertilize regularly for optimal growth.
What pests or diseases should I watch for with Elstar apple trees?
Elstars are relatively resilient, but keep an eye out for apple scab (fuzzy spots on leaves), codling moths (worms in fruit), and aphids. Prevent issues with copper fungicide (for scab) and row covers (for moths). Prune for airflow, and remove fallen fruit to deter pests.
How do I know if my Elstar apples are ripe?
Elstar apples ripen in late summer to early fall (August–September). Look for a bright yellow-red blush, firm but slightly soft skin, and a sweet-tart aroma near the stem. They’re best picked when fully colored but still crisp—waiting too long can lead to mealiness.
Wrapping up and next steps
Growing an Elstar apple tree is a rewarding journey that blends ease with abundance—perfect for both seasoned gardeners and beginners! 🌳 With its minimal pruning needs and year-round fruitfulness, this variety turns your backyard into a sweet, low-maintenance paradise.
Whether you’re drawn to its crisp flavor or resilient nature, the Elstar delivers delicious results with less effort.
Ready to plant your own? Start by choosing the right spot, gathering your tools, and embracing the simple care routine outlined above. Before you know it, you’ll be harvesting homegrown apples that taste like summer—one pruning session at a time! 🍏✨