Pests
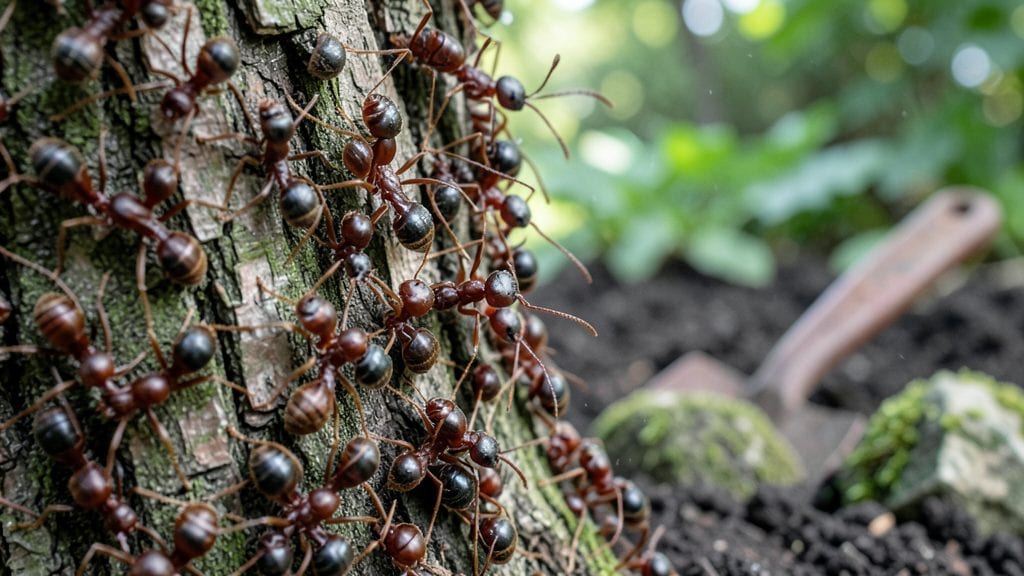
An ant barrier around trees stops the march of fire ants and carpenter ants before they reach your roots. 🌳 I’ve watched these tiny invaders strip bark and create tunnels that strangle young trees—until I learned how to create a physical blockade that works.
The key isn’t just repellent; it’s a trench or ring that ants simply can’t cross, no matter how persistent they get.
You’ll need basic supplies: a shovel, a 2-inch-deep trench, and either diatomaceous earth or a thin layer of sand to create the barrier. For chemical options, insecticidal granules work too, but the natural method is just as effective when done right.
The best part? This barrier lasts for months, protecting your trees from the most destructive ant species without harming the soil or your landscape.
Once installed, you’ll see the difference immediately—no more trails of ants climbing your trunk or tunneling into the roots. Your trees will grow stronger, with fewer signs of stress from pests. The barrier even deters other critters like termites and rodents, making it a multi-purpose defense for your yard.
Works for any tree species, from young saplings to mature oaks, and requires just a weekend afternoon to set up. Here’s how to make it last all season long.
📚 In This Guide
- What you need
- Instructions
- Tips and common mistakes
- Wrapping up and next steps
What you need
- ● Granular diatomaceous earth (food-grade): 1–2 lbs (enough to create a 2–3 inch band around the tree trunk). Pro tip: 💡 Use a dust mask when handling!
- ● Sand or fine gravel: 3–5 lbs (for a physical barrier layer).
- ● Tape measure: To measure the tree’s circumference and barrier width.
- ○ Garden hose with spray nozzle: For wetting down the barrier (optional but helpful).
- ● Gloves (nitrile or rubber): To protect your hands from grit and irritants.
- ● Sticky traps or ant bait stations: Placed outside the barrier to lure ants away.
- ● Copper tape (1/2 inch wide): Wrap around the tree trunk as a natural ant repellent.
- ● Mulch (cypress or cedar chips): Apply a thin layer around the barrier to deter ants long-term.
- ● Spray bottle with soapy water: For spot-treating ants on the tree trunk.
Step-by-Step instructions for creating an ant barrier around trees
Here's the simple, effective method I use to keep ants from marching straight to your tree roots.
🪴 Step 1: Choose and Prepare Your Barrier Material
Grab a 12-inch wide strip of aluminum flashing (the same width works for all tree sizes) and cut it to a length that circles your tree's trunk at the base. I like to use aluminum because it's durable, easy to shape, and ants can't chew through it. For smaller trees, a single strip works fine, but larger trees may need two overlapping strips for full coverage.
Bend the strip into a U-shape with the open side facing outward from the tree. The vertical sides should stand about 2-3 inches tall—this height stops ants from climbing over while keeping the barrier hidden under mulch. If you're using plastic tree guards, follow the manufacturer's instructions for height and installation.
🌱 Step 2: Install the Barrier Around the Tree
Position the U-shaped barrier 2-3 inches away from the tree trunk and press it 1-2 inches deep into the soil. The goal is to create a continuous, unbroken circle—even a small gap lets ants bypass the barrier. For extra security, overlap the ends by 1-2 inches and bend them downward into the soil.
I always check for rocks or roots before pressing the barrier in. If you hit resistance, adjust the position slightly to avoid damaging the tree. The barrier should sit flush with the ground—no gaps where ants could tunnel underneath. For trees with raised root flares, angle the barrier slightly upward to match the natural slope.
💧 Step 3: Seal Gaps and Add Mulch
Use soil or fine gravel to fill any small gaps between the barrier and the tree trunk. Pack it lightly but firmly to prevent ants from squeezing through. If you're using diatomaceous earth as an extra deterrent, sprinkle a thin layer inside the barrier (but keep it away from the tree trunk to avoid harming the bark).
Top the barrier with 2-3 inches of organic mulch, like shredded bark or wood chips. This hides the barrier while keeping ants from climbing over it. Avoid piling mulch directly against the tree trunk—leave a 1-inch gap to prevent moisture buildup and rot. Water the area lightly after installation to help settle the mulch.
✂️ Step 4: Inspect and Maintain the Barrier
Check the barrier once a month for gaps, damage, or ant activity. Ants are persistent, so if you spot them climbing over the top, add an extra inch of mulch or reinforce the barrier with a second strip. Over time, the aluminum may rust slightly—just replace the affected section to keep the barrier intact.
If you notice ants tunneling under the barrier, dig up the soil and press the edges deeper into the ground. For trees in high-ant areas, I recommend reapplying the barrier every 2-3 years or when it starts to degrade. A little maintenance now saves your tree from long-term damage later.
Tips & tricks for creating an effective ant barrier around trees
Between us, I've spent years perfecting this ant barrier system—and these are the small details that make all the difference between a temporary fix and a long-term solution.
Material Selection Matters: While aluminum flashing is my go-to, you can also use galvanized metal flashing or even hard plastic tree guards if you prefer. The key is choosing something rigid that ants can't chew through. I've found that thinner materials like sheet metal bend too easily, creating gaps where ants can sneak through. For extra durability, especially in high-ant areas, consider using two layers of aluminum with a slight overlap.
Precision Installation: In Step 2, when positioning your barrier, I can't stress enough how important that 2-3 inch gap from the trunk is. This distance prevents ants from bridging the gap with debris or soil. For trees with irregular root flares, take a few extra minutes to shape the barrier to match the natural contour—this creates a seamless barrier that ants can't navigate. I've seen ants climb over barriers that weren't perfectly flush with the ground, so pay attention to those details.
Sealing Strategy: The diatomaceous earth mentioned in Step 3 is optional but highly effective if you're dealing with a serious ant infestation. Just remember to keep it at least 1 inch away from the tree trunk to avoid damaging the bark. For an extra layer of protection, you can also apply a thin layer of petroleum jelly on the inside of the barrier's upper edges—ants hate crossing this sticky barrier. This works particularly well for trees near ant trails.
Maintenance Schedule: That monthly inspection in Step 4 is non-negotiable if you want this barrier to last. I've seen barriers fail within weeks because homeowners forgot to check for gaps. Mark your calendar or set a phone reminder—trust me, you'll thank yourself when you see those ants trying (and failing) to climb over your well-maintained barrier. For trees in particularly active ant areas, consider adding a visual inspection every two weeks during the first month after installation.
Pro Tips for Ant Barrier Around Trees
- Between us, I've spent years perfecting this ant barrier system—and these are the small details that make all the difference between a temporary fix and a long-term solution.
- Material Selection Matters: While aluminum flashing is my go-to, you can also use galvanized metal flashing or even hard plastic tree guards if you prefer.
- Precision Installation: In Step 2, when positioning your barrier, I can't stress enough how important that 2-3 inch gap from the trunk is.
Frequently asked questions
What’s the best time of year to set up an ant barrier around trees?
Spring or early summer is ideal! This is when ants are most active and start building colonies. Avoid winter—ants are less active, and cold weather can damage DIY barriers. If you’re dealing with an existing infestation, act fast to prevent them from spreading to your tree roots.
Can I use other materials besides diatomaceous earth or sand?
Try these alternatives:
- Copper tape: Ants avoid copper’s electrical charge—wrap it loosely around the tree trunk.
- Coffee grounds: Sprinkle used grounds in a 2-inch band around the base (ants hate the smell!).
- Essential oils: Dilute peppermint or citrus oil with water and spray a thin line around the tree.
- Rocks or gravel: Create a physical barrier ants can’t cross (but check for gaps!).
Just ensure the material stays in place and doesn’t harm the tree!
What if ants keep coming back after I set up the barrier?
Don’t panic—it’s common! Check for:
- Gaps: Ants can squeeze through tiny spaces. Seal cracks with caulk or add more barrier material.
- Bridges: Look for leaves, twigs, or soil bridges connecting the barrier to the ground. Remove them!
- New entry points: Ants may find another route. Reapply the barrier every few weeks or after rain.
If the problem persists, consider professional pest control for a deeper solution.
Will an ant barrier hurt my tree or grass?
Not if you choose the right materials! Safe options like sand, diatomaceous earth (food-grade), or copper tape won’t harm trees or grass. Avoid harsh chemicals (e.g., pesticides) near roots—they can damage soil microbes. Always test a small area first if you’re unsure.
How long does an ant barrier last?
Barriers typically last 1–3 months, depending on weather and ant activity. Heavy rain or foot traffic can disrupt them, so plan to refresh the barrier every season or after disturbances. For long-term protection, combine barriers with natural deterrents like nematodes or ant-repelling plants (e.g., mint or lavender).
Wrapping up and next steps
Creating an ant barrier around trees is a simple yet powerful way to protect your yard’s roots and keep pests at bay—without harsh chemicals! 🌳 By using natural repellents like diatomaceous earth, cinnamon, or petroleum jelly, you’re not just safeguarding your plants but also promoting a healthier ecosystem. Your effort today could save your trees tomorrow!
Ready to take action? Start by inspecting your trees, gathering your materials, and applying the barrier in a few easy steps. Small steps lead to big results—give it a try and watch your garden thrive!