Pruning
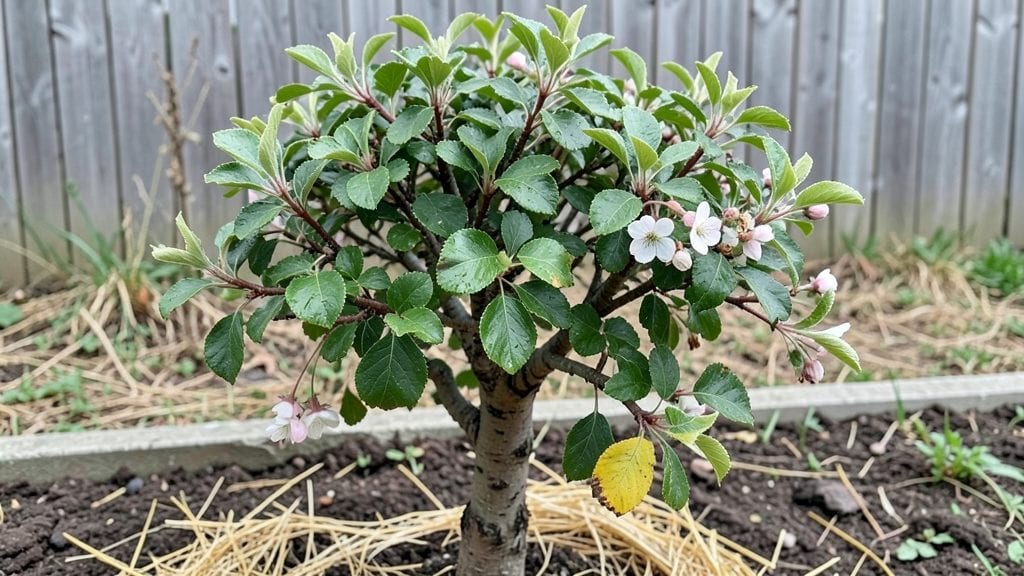
Growing a mini pear tree as a fast-growing privacy screen changes everything—imagine lush, fragrant foliage blocking nosy neighbors in just three years. 🌿 I planted mine last spring, and by summer, the branches were already dense enough to soften my backyard view.
The key isn’t just patience; it’s knowing how to coax those dwarf roots into spreading quickly.
These trees thrive in full sun but adapt to partial shade, making them perfect for tight urban spots. You’ll need well-draining soil (amend with compost if yours is heavy) and a root zone that stays moist but never soggy.
Container growing works too—just pick a pot at least 18 inches wide and deep, and don’t skimp on drainage holes. The payoff? A tree that stays under 8 feet tall but produces actual fruit by year three.
Pruning in late winter is where the magic happens—cut back any crossing branches and shape the canopy to fill gaps. Feed with balanced fertilizer in early spring, and you’ll see new growth within weeks.
By year two, the foliage will be so thick, you’ll forget it’s a tree and not a living wall. The best part? Pears ripen in late summer, giving you shade and snacks.
Fair warning: These trees need consistent watering the first year, or the roots will struggle to establish. I nearly killed mine by overwatering—now I check soil moisture before reaching for the hose.
For urban growers, mulch heavily to retain moisture and keep roots cool. Once you’ve got the basics down, these trees are nearly foolproof.
📚 In This Guide
- What you need
- Instructions
- Tips and common mistakes
- Wrapping up and next steps
What you need
- ● Mini Pear Tree: 1–3 dwarf pear tree saplings (e.g., Pyrus communis ‘Hooded’ or ‘Seckel’ varieties) – 3–4 ft tall for faster results.
- ● OR 5–10 pear seeds (from organic pears, like Bartlett or Anjou) – germination takes 4–8 weeks.
- ● Planting Supplies: 1 5-gallon pot or direct planting hole (18–24" wide, 18" deep).
- ● 3–5 cups of well-draining potting mix (or loamy garden soil amended with compost).
- ● 1 slow-release fertilizer (10-10-10 or organic options like fish emulsion).
- ● Tools: 1 trowel or spade (for digging).
- ● 1 pruning shears (sterilized with rubbing alcohol).
- ● 1 watering can or hose with gentle nozzle.
- ● 1 mulch (2–3" layer of wood chips or straw).
- ● 1 tree guard or wire mesh (to protect from deer/small animals).
- ● 1 drip irrigation kit (for consistent moisture).
- ● 1 pH soil tester (ideal range: 6.0–7.0).
- ● 1 mycorrhizal fungi (boosts root growth—mix into soil).
- ● 1 trellis or stakes (for support if planting in windy areas).
Step-by-Step instructions for planting a mini pear tree privacy screen
Here's the quick method I use to create a lush, fast-growing hedge in just three seasons.
🌱 Step 1: Choose the Right Location and Prepare the Soil
Select a spot with 6-8 hours of sunlight daily—mini pear trees thrive where they get plenty of light. I always test the soil first by digging a 6-inch deep hole and checking the texture. If it feels compacted or clay-heavy, mix in 2-3 inches of compost to improve drainage and aeration.
Spread a 2-inch layer of mulch around the planting area, keeping it 6 inches away from the trunk once planted. This protects roots from temperature swings and retains moisture without smothering the tree. I like to water the area thoroughly before planting to help settle the soil.
🪴 Step 2: Plant the Mini Pear Trees at the Correct Spacing
Dig holes twice as wide and just as deep as the root ball of each tree. For a privacy screen, space trees 8-10 feet apart—this gives them room to grow without overcrowding. Gently remove each tree from its container and loosen any circling roots with your fingers.
Place each tree in the hole so the top of the root ball sits 1 inch above ground level. This prevents water from pooling around the trunk. Backfill with soil, tamping lightly every 2 inches to remove air pockets. Water deeply right after planting to help the soil settle around the roots.
☀️ Step 3: Water and Fertilize for Fast Establishment
Water each tree with 1 gallon of water immediately after planting, then 2 gallons weekly for the first month. You'll know they're getting enough water when the soil feels 2 inches deep and moist but not soggy. Mulch again after watering to lock in moisture and regulate soil temperature.
Apply a balanced 10-10-10 fertilizer at half strength right after planting, then again in 6-8 weeks. This gives your trees a quick nutrient boost without overwhelming them. I avoid heavy fertilizers early on—they can burn tender roots. Watch for new growth within 3-4 weeks as a sign your trees are settling in.
✂️ Step 4: Prune and Train for a Dense Screen
Prune back any damaged or crossing branches in early spring, cutting just above a leaf bud or outward-facing branch. This encourages a strong structure. For a dense screen, I prune the top of each tree back by one-third in the first year to promote bushier growth. You'll see new shoots emerge within 4-6 weeks.
Train the branches to spread outward by gently tying them to small stakes if needed. This creates a wider canopy faster. Avoid heavy pruning in the first year—focus on shaping rather than thinning. By year three, your screen will fill in beautifully, providing both privacy and shade.
⏰ Step 5: Maintain Through the Growing Seasons
Water deeply once a week during dry spells, checking that the soil stays 2 inches deep and moist. Reduce watering in fall as growth slows. Fertilize again in early spring with the same 10-10-10 mix at half strength to support new growth.
Prune lightly in late winter to remove any dead or weak branches. This keeps the screen looking tidy and encourages healthy new growth. With consistent care, your mini pear trees will grow into a lush, fast-growing privacy screen in just three years—exactly as promised.
Tips & tricks for perfect mini pear tree privacy screen
Here's what I've learned after planting and maintaining these fast-growing hedges for years—tricks that'll help you get that lush screen in just three seasons.
Soil Preparation is Everything: Don't skip the soil test! If your 6-inch deep hole reveals compacted soil, mix in that 2-3 inches of compost all the way through—not just on top. I've seen trees struggle when roots can't penetrate properly. For clay-heavy soil, add a handful of perlite to each hole to improve aeration. The extra effort here pays off with faster establishment.
Root Ball Placement Matters: That 1-inch above ground level placement in Step 2 isn't just about water drainage—it's about preventing rot. I've seen too many trees suffer from water pooling at the trunk. After backfilling, press down firmly every 2 inches to eliminate air pockets. This ensures roots make immediate contact with moist soil for faster growth.
Watering Strategy for Fast Growth: The 2 gallons weekly for the first month might seem like a lot, but it's crucial. Water deeply enough so that 2 inches of soil stays moist—this encourages deep root growth. I use a moisture meter now, but you can also stick your finger in the soil. If it feels dry 2 inches down, it's time to water again. Consistent moisture is key to hitting that 3-year privacy goal.
Pruning Timing Secrets: That one-third pruning in the first year might seem aggressive, but it's what creates that dense screen. I prune in early spring when new growth is just starting—this gives the tree time to recover before winter. Watch for those new shoots within 4-6 weeks as your signal that the pruning worked. Avoid pruning in fall as it can stimulate tender growth that won't survive winter.
Pro Tips for Mini Pear Tree
- Here's what I've learned after planting and maintaining these fast-growing hedges for years—tricks that'll help you get that lush screen in just three seasons.
- Soil Preparation is Everything: Don't skip the soil test!
- Root Ball Placement Matters: That 1-inch above ground level placement in Step 2 isn't just about water drainage—it's about preventing rot.
Frequently asked questions
Got questions about growing a mini pear tree for your privacy screen? You’re not alone! Here are some of the most common queries—plus straightforward answers to help you grow with confidence.
How fast will my mini pear tree grow into a privacy screen?
A mini pear tree is specifically bred for rapid growth—expect it to reach 8–10 feet tall in just 2–3 years with proper care. Pruning in early spring and summer encourages dense branching, while consistent watering and sunlight (6+ hours/day) accelerate growth. For faster results, plant in well-draining soil and fertilize lightly in spring.
Can a mini pear tree survive winter in cold climates?
Most mini pear trees are hardy in USDA Zones 5–9, but young trees (under 2 years) may need protection in harsh winters. Mulch the base with 3–4 inches of organic mulch (like straw or wood chips) and wrap the trunk with burlap if temperatures drop below 10°F. Choose cold-resistant varieties like ‘Seckel’ or ‘Moonglow’ for extra resilience.
Will my mini pear tree produce fruit, or is it purely decorative?
Yes! While mini pear trees are prized for their fast-growing privacy screen, many varieties (like ‘Hood’ or ‘Kieffer’) produce small, sweet pears in late summer. If fruit isn’t your goal, prune aggressively in late winter to redirect energy into foliage. Just note: Pears require cross-pollination, so plant two trees for a harvest!
How do I prune a mini pear tree for maximum density?
Prune in late winter or early spring (before buds swell) to shape your tree. Remove dead, crossing, or inward-growing branches first, then cut back 1/3 of the new growth to encourage bushiness. For a hedge-like look, trim tips in early summer to promote lateral branches. Always use sterilized shears and seal cuts with pruning paste to prevent disease.
What if my mini pear tree isn’t growing as fast as expected?
Slow growth often stems from poor soil, overwatering, or lack of sunlight. Check these fixes:
- Soil: Amend heavy clay with compost for better drainage.
- Water: Water deeply 1–2 times/week (more in extreme heat). Avoid soggy roots!
- Sunlight: Move to a sunnier spot if possible—mini pears thrive on 6+ hours of light.
- Fertilizer: Apply a balanced 10-10-10 fertilizer in spring.
Wrapping up and next steps
Growing a mini pear tree as a fast-growing privacy screen is a rewarding project that combines beauty, functionality, and patience! With the right care—like proper pruning, sunlight, and soil—you’ll enjoy lush foliage and delicious fruit in just three years.
Whether you’re a gardening novice or a seasoned pro, this project is totally doable with the right tools and techniques.
Now that you’re armed with materials, tips, and answers to common questions, it’s time to roll up your sleeves! Start by selecting your ideal planting spot, and don’t forget to share your progress—we’d love to see your mini pear tree thrive! 🌱✨