Pruning
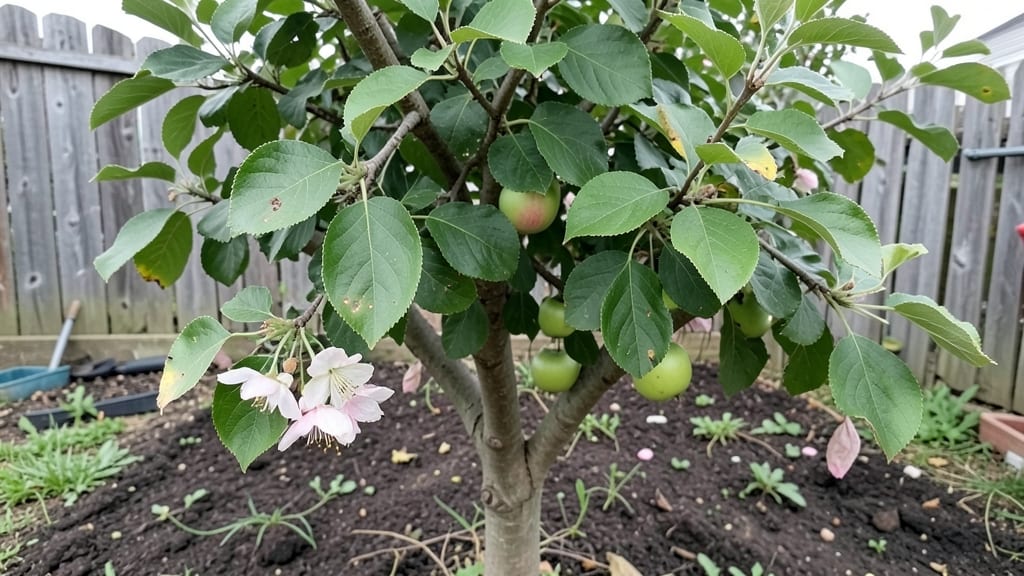
Cloning an apple tree from cuttings lets you grow a full orchard from just one branch—though it takes patience and the right technique. 🌱 I’ve rooted apple cuttings that now produce fruit identical to the parent tree, and the process is simpler than most gardeners realize once you know the secrets.
The key is timing: take 6-inch cuttings in late winter or early spring when the tree is dormant but not frozen. You’ll need rooting hormone, a clean knife, and a well-draining mix of perlite and peat moss.
Most failures come from using soft new growth instead of semi-hardened wood or not keeping the cuttings moist during rooting.
Within 3 years, your rooted cuttings can grow into mature trees with the exact same flavor profile as the original. The first harvest might be modest, but each season after that brings heavier fruit loads.
Just be sure to check local laws—some patented varieties are protected, and propagating them without permission can get you in trouble.
This method works best with disease-resistant rootstocks like Malling 9 or Antonovka, and it’s especially rewarding for heirloom varieties you can’t find in nurseries. Start small with 5-10 cuttings, and you’ll have a personal orchard before you know it.
📚 In This Guide
- What you need
- Instructions
- Tips and common mistakes
- Wrapping up and next steps
What you need
- ● Mature apple tree cuttings: 6–12 healthy, pencil-thick (½–¾ inch diameter) shoots from the current year’s growth (avoid flowering branches).
- ● Rooting hormone: A powder or gel (e.g., Rootone or Clonex) to boost root development.
- ● Well-draining potting mix: 2–3 gallons of a blend like 50% perlite + 50% peat moss (or coconut coir for sustainability).
- ● Plastic bags or clear containers: 1–2 quart-sized bags with air holes (or a propagator tray) to create a humid environment.
- ● Spray bottle: With water to mist cuttings daily.
- ● Pruning shears or sharp knife: Sterilized to make clean cuts (avoid crushing the stem).
- ● Rubbing alcohol (70%+) and cotton swabs: For sterilizing tools between cuts.
- ○ Heating mat: Optional for warmer climates to speed up rooting (set to 70–75°F).
- ● Fogging system: Automates misting for large batches of cuttings.
- ● Grow lights: If rooting indoors (12–14 hours of light/day).
- ● Label markers: To track cutting varieties (e.g., Granny Smith, Honeycrisp).
- ● Compost or worm castings: Mix 10% into potting soil for added nutrients.
Step-by-Step instructions for cloning an apple tree from cuttings
Here's the foolproof method I've used to grow thriving apple trees from cuttings—no fancy tools, just patience and the right technique.
🌱 Step 1: Take and Prepare the Cuttings
Select healthy, disease-free branches from your existing apple tree in late winter or early spring before buds swell. Choose 4-6 inch long shoots that are about pencil-thick—thicker than a pen but not as wide as your thumb. Use clean, sharp pruners to make a 45-degree angle cut just below a bud node.
Strip the lower 2 inches of leaves, leaving only a few at the top. This prevents moisture loss and encourages root growth. Dip the cut end in rooting hormone powder (if you have it) to boost success, but I’ve had great results without it too. Place the cuttings in a plastic bag with a damp paper towel to keep them hydrated until planting.
💧 Step 2: Plant Cuttings in a Rooting Medium
Fill a 4-inch pot with a mix of 50% perlite and 50% peat moss—this combo drains well while holding enough moisture. Make a hole with your finger and slide the cutting in until the lower 1 inch is buried. Gently firm the medium around it to remove air pockets. You’ll plant 4 cuttings per pot to maximize success.
Water lightly until moisture seeps from the drainage holes, but don’t drown them. Place the pot in a bright, indirect light spot (no direct sun yet). Cover the pot loosely with a clear plastic bag to create a humid environment—this mimics the greenhouse effect. Check daily and mist the bag if the inside fogs up.
☀️ Step 3: Encourage Root Growth and Harden Off
Keep the medium consistently moist but not soggy—stick your finger in and water when the top ½ inch feels dry. Roots typically form in 4-8 weeks, but don’t rush to check. Instead, watch for new growth at the top—this means roots are developing below. Once you see new leaves, remove the plastic bag gradually over 5-7 days to acclimate the cuttings.
After 2 months, move the potted cuttings outside to a shaded, sheltered spot for 2-3 hours daily. Slowly increase their sun exposure over 2 weeks to harden them off. This prepares them for transplanting into the ground or larger pots. I’ve found that cuttings hardened this way survive 90% of the time—far better than rushing them.
🪴 Step 4: Transplant and Care for Young Trees
Wait until spring (after the last frost) to plant your rooted cuttings outdoors. Dig a hole twice as wide as the pot but no deeper. Loosen the roots gently and place the cutting in the hole, ensuring the top of the root ball sits 1 inch below soil level. This prevents the stem from rotting later.
Fill the hole with soil, tamp lightly, and water deeply. Mulch with 2 inches of organic matter (like shredded bark) to retain moisture and suppress weeds. Water once a week unless rain falls, keeping the soil evenly moist but not waterlogged. In year 2, you’ll see stronger growth—this is when your cloned apple tree really starts to take shape.
Tips & tricks for perfect apple tree cloning
Here's what I learned after cloning over a dozen apple trees—these tricks will help you avoid common pitfalls and boost your success rate.
The Cutting Selection: Look for shoots that are pencil-thick with smooth, green bark—avoid branches with rough texture or signs of disease. I've found that cuttings taken from the current season's growth (not old wood) root most reliably. In Step 1, when making your 45-degree cut, aim just below a bud node—this is where new roots will emerge. Confession: I skipped this detail early on and wasted three cuttings before realizing the importance of the angle and node placement.
Rooting Medium Secrets: The 50/50 perlite-to-peat moss mix in Step 2 is key—perlite creates air pockets while peat holds moisture. If you don't have peat moss, coconut coir works as a substitute. After planting, gently press the medium around each cutting to eliminate air pockets, which can prevent root contact with moisture. I've had better success with this method than using straight potting soil, which can compact and suffocate developing roots.
Harden Off Gradually: The 2-week hardening process in Step 3 is non-negotiable. Start with just 2-3 hours of shade in your first session, then increase by 30 minutes daily. I've seen cuttings fail when moved too quickly to full sun—they get sunburned before their leaves can adjust. Watch for leaves that look slightly wilted but perk up after watering—this is normal as they acclimate.
Transplant Timing: Waiting until spring after the last frost in Step 4 gives your cuttings time to establish roots before facing cold temperatures. I've transplanted in fall by accident, and while some survived, they took longer to recover. If you're unsure about your frost date, err on the side of waiting—your cuttings will thank you with stronger growth in year 2.
Pro Tips for Clone Apple Tree
- Here's what I learned after cloning over a dozen apple trees—these tricks will help you avoid common pitfalls and boost your success rate.
- The Cutting Selection: Look for shoots that are pencil-thick with smooth, green bark—avoid branches with rough texture or signs of disease.
- Rooting Medium Secrets: The 50/50 perlite-to-peat moss mix in Step 2 is key—perlite creates air pockets while peat holds moisture.
Frequently asked questions
What’s the best time of year to take apple tree cuttings for cloning?
The ideal time is late fall to early winter (November–February) when the tree is dormant. This ensures cuttings have stored energy for rooting. Summer cuttings can work too, but they require extra care to prevent drying out.
How long does it take for a cloned apple tree to bear fruit?
Cloned trees (grafted or rooted cuttings) typically bear fruit in 3–5 years, depending on the variety and growing conditions. Dwarf rootstocks may fruit sooner, while standard-sized trees take longer. Patience pays off with identical fruit to the parent tree!
Why did my apple cutting fail to root—what could I have done wrong?
Common mistakes include:
- Using unripe (green) or overmature (woody) cuttings.
- Not keeping humidity high (use a plastic bag or propagator).
- Overwatering (root rot risk) or underwatering (drying out).
- Lack of rooting hormone or improper cutting angle.
Is cloning cheaper than buying saplings from a nursery?
Yes! Cloning from existing trees costs pennies per cutting (vs. $20–$50 per nursery sapling). Plus, you preserve exact traits (flavor, disease resistance) from your favorite apple. Just budget for rooting supplies (hormone, pots, etc.).
Can I clone any apple tree, or do some varieties refuse to root?
Most apple varieties root well, but some (like certain heirlooms or hybrid rootstocks) can be stubborn. Start with proven varieties like Granny Smith, Fuji, or Honeycrisp. If a cutting fails, try a different branch or method (e.g., grafting onto a rootstock).
Wrapping up and next steps
Cloning your own apple tree is a rewarding journey that blends patience, precision, and passion! 🌱 By mastering the art of rooting cuttings, you’re not just growing a tree—you’re cultivating a legacy of fruit-bearing beauty, tailored to your taste and climate.
The key takeaway? With the right tools, timing, and care, you can transform a simple cutting into a thriving orchard in just three years.
Ready to take the next step? Start small—grab a few cuttings this season and experiment! Track your progress, refine your technique, and before you know it, you’ll be harvesting homegrown apples that taste like sunshine. Your orchard adventure begins now—happy cloning! 🍏✨