
Propagation
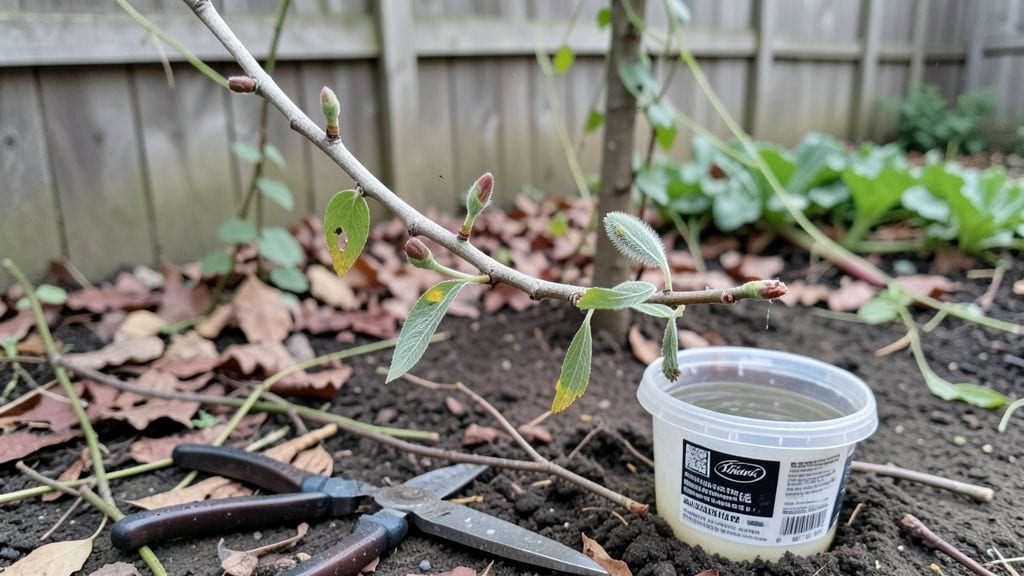
Taking cuttings from a willow tree is easier than you think—especially when you time it right. 🌱 Late winter or early spring is the sweet spot, when willow’s sap is flowing but before the leaves burst forth.
I’ve rooted dozens of willow cuttings this way, and the secret lies in choosing the right branches and giving them the perfect start.
The best cuttings come from softwood branches—flexible, green shoots about the thickness of a pencil. Avoid hardwood (thick, woody stems), as they root poorly. Dip the cut end in rooting hormone (optional but helpful), then place in water or moist soil.
Within 3-4 weeks, you’ll see fuzzy white roots forming—proof your cutting is working.
Willow’s rapid growth means you’ll have 3-foot-tall saplings in just 3 months, but they need patience. Keep cuttings in bright, indirect light and change the water every few days to prevent mold. The biggest challenge? Willow’s aggressive rooting can mean overcrowding, so give each cutting space to breathe.
This method works for weeping willows, pussy willows, and even those stubborn hybrid varieties. Once rooted, transplant to soil and watch them take off—just be ready for a tree that grows faster than you can keep up with. Here’s how to do it right the first time.
📚 In This Guide
- What you need
- Instructions
- Tips and common mistakes
- Wrapping up and next steps
What you need
- ● Willow cuttings: 3–6 healthy, pencil-thick stems (12–18 inches long) with at least 3–4 buds per cutting.
- ○ Rooting hormone: 1 small bottle (optional but recommended for faster root growth).
- ● Well-draining soil: A mix of 50% perlite or sand + 50% peat moss or potting soil (sterilized).
- ● Containers: 3–6 small pots (4–6 inches deep) or a shallow tray with drainage holes.
- ● Watering can or spray bottle: For gentle hydration (avoid soaking!).
- ● Clear plastic bag or humidity dome: To retain moisture during rooting (8–12 inches tall).
- ● Pruning shears or sharp knife: Clean and sterilized to make precise cuts.
- ● Ruler or measuring tape: For consistent cutting lengths.
- ● Misting nozzle attachment for your spray bottle.
- ● Grow lights or a sunny windowsill (if natural light is limited).
- ● Label markers to track cutting varieties.
- ● Fungicide (like hydrogen peroxide or cinnamon powder) to prevent rot.
- ● Old newspaper or cardboard for mulch around pots.
How to propagate willow tree cuttings in 3 months
Willow cuttings root easily with the right technique—here’s my foolproof method.
🌱 Step 1: Take Healthy Cuttings at the Right Time
Timing is everything. Harvest 4-6 inch long cuttings in late winter or early spring before new growth begins. Look for flexible, pencil-thick stems with no flowers or buds—these root best. Use clean, sharp pruners to avoid crushing the stem.
I always take cuttings from non-woody, greenish-brown sections just below a leaf node. Willow stems are hollow, so snap them cleanly instead of tearing. Store them in a damp paper towel in a sealed plastic bag until you’re ready to root them—this keeps them fresh for up to a week.
💧 Step 2: Prepare the Rooting Medium and Plant
Fill a 6-inch deep container with a mix of equal parts perlite and peat moss (or use the 2 gallons of potting mix you’ve pre-moistened). Willow cuttings hate soggy soil, so ensure the mix drains well. Tap the container gently to settle the medium without compacting it.
Dip the bottom 2 inches of each cutting in rooting hormone (optional but speeds up rooting). Stick 3-4 cuttings into the mix, spacing them 2 inches apart. Press lightly so they stand upright but don’t force them—willow stems are fragile. Water lightly until the surface feels damp but not wet.
☀️ Step 3: Provide Humidity and Indirect Light
Place the container in a bright, indirect light spot—like a north-facing window or under 50% shade cloth. Willow cuttings need high humidity to root, so cover them with a clear plastic bag secured loosely with twine. Check daily for condensation; if the bag fogs up, leave it off for an hour to prevent mold.
Keep the soil evenly moist—not soggy, not dry. I water every 2-3 days and mist the cuttings weekly. Roots should appear in 4-6 weeks, but don’t rush it. If leaves yellow, you’re overwatering; if they wilt, the mix is too dry. Adjust accordingly.
✂️ Step 4: Transplant When Roots Form
After 8-12 weeks, gently tug a cutting to check for resistance—this means roots have formed. Once all cuttings show roots, transplant them into individual 1-gallon pots filled with well-draining potting mix. Handle stems carefully; willow roots are delicate and break easily.
Keep the new pots in partial shade for a week to help them adjust. Water deeply when the top inch of soil feels dry, but avoid soggy conditions. Willow cuttings grow fast once rooted—you’ll see new leaves within 2-3 weeks of transplanting.
🪴 Step 5: Harden Off and Plant Outdoors
Before moving cuttings outside, harden them off by placing them in a sheltered, shaded spot for 1-2 hours daily, gradually increasing time over 10-14 days. This toughens the stems so they don’t shock when planted.
Choose a moist, well-drained spot with full sun to partial shade. Dig a hole twice as wide as the root ball but no deeper. Plant at the same depth as the pot, firm the soil gently, and water deeply. Mulch with 2 inches of organic mulch to retain moisture and suppress weeds.
Tips & tricks for perfect willow tree cuttings
Here's what I've learned after propagating willow trees successfully for years—these little details make all the difference in your 3-month success rate.
Timing is Everything: In Step 1, don't rush the cutting process. The late winter or early spring window is critical because willow trees are entering their growth phase. If you miss this, try again in fall when the sap begins to slow down. I've tried cutting in summer and the stems just rot in the water—don't make my mistake!
The Stem Selection Secret: When choosing your 4-6 inch long cuttings in Step 1, look for stems that are flexible like a green pencil—not brittle or woody. I always test flexibility by trying to bend the stem slightly with my fingers. The best cuttings should bend without snapping. Also, make sure to cut just below a leaf node—this is where the roots will form.
Rooting Hormone Alternative: In Step 2, while rooting hormone speeds up the process, you can use cinnamon as a natural alternative. Simply dip the bottom 2 inches of your cuttings in cinnamon powder before planting. It's antifungal and helps stimulate root growth. Just be sure to use organic cinnamon—no additives!
Humidity Management: For Step 3, maintaining humidity is key but don't let your plastic bag become a sauna. If you see heavy condensation every time you check, leave the bag off for 1-2 hours to let excess moisture escape. I've lost cuttings to mold from over-humidifying—better to check twice than lose your whole batch.
Pro Tips for Can You Take A Cutting From A Willow Tree
- Here's what I've learned after propagating willow trees successfully for years—these little details make all the difference in your 3-month success rate.
- Timing is Everything: In Step 1, don't rush the cutting process.
- The Stem Selection Secret: When choosing your 4-6 inch long cuttings in Step 1, look for stems that are flexible like a green pencil—not brittle or woody.
Frequently asked questions
Got questions about propagating willow cuttings?
You’re not alone! Here are some of the most common queries—plus straightforward answers to help you succeed.
When is the best time to take willow cuttings?
The ideal window is late winter to early spring (just before new growth starts) or fall (after leaves drop). Willow cuttings root best when the tree isn’t actively flowering or stressed. Avoid summer heat, which can dry them out too quickly.
How long does it take for willow cuttings to root?
Willow cuttings are fast growers! With the right conditions (moisture, indirect light, and a rooting hormone), you’ll often see roots in 2–4 weeks. Some varieties even sprout leaves within a month. Patience pays off—check gently after 3 weeks to avoid disturbing early roots.
Can I use willow cuttings from any part of the tree?
Yes, but focus on softwood or semi-hardwood cuttings (1–2 feet long, pencil-thick). Avoid woody, mature branches—they root poorly. Young, flexible stems from the current year’s growth are your best bet. Trim just below a node (the bump where leaves attach) for optimal success.
What if my willow cuttings rot instead of rooting?
Overwatering or poor drainage is usually the culprit. Use a well-draining mix (like perlite + peat) and keep the cutting moist—not soggy. If you spot mold or mushy stems, trim the affected area, dip in fungicide, and repot. A clear plastic bag (to trap humidity) can help, but ventilate daily to prevent rot.
Are there alternatives if my willow cuttings fail?
No worries! Try water propagation (place cuttings in a jar of water until roots form, then transplant) or layering (bend a low branch to the ground, weigh it down, and cover with soil). For stubborn varieties, willow seeds (though slower) or buying a young sapling from a nursery are backup options.
Wrapping up and next steps
Taking a cutting from a willow tree is a rewarding way to propagate this fast-growing, versatile plant—especially when using the layered roots method. With patience and the right techniques, you’ll see roots develop in just three months, giving you a ready-to-plant sapling.
Whether you’re a gardening beginner or a seasoned green thumb, this method is simple, cost-effective, and highly successful.
Now that you’re armed with the know-how, why not give it a try? Grab your tools, pick a sunny day, and start layering those willow cuttings. Before you know it, you’ll have a thriving willow tree—and maybe even a few extra to share with friends! 🌱✨